How to Adjust Your Honeywell Thermostat: Every Model, Every Setting, Every Situation
From the round dial on the wall to the T9 app on your phone — a clear, no-jargon guide to adjusting temperature, changing schedules, and getting every Honeywell model working the way you want.
Adjusting a Honeywell thermostat sounds like it should be simple. Turn the dial up, it gets warmer. Press the up arrow, same result. But there are over 50 different Honeywell residential thermostat models currently on the market — and they behave very differently from each other. The mechanical round dial works nothing like the T6 Pro app. The RTH9585 touchscreen has programming menus buried three levels deep. The T9 can be adjusted from anywhere in the world from your phone, but the same adjustment might not work if the thermostat is in Hold mode.
This guide covers every Honeywell thermostat type, in plain language. Whether you just moved into a house with an unfamiliar thermostat or you have had the same model for years and finally want to understand its settings properly, you will find exactly what you need here.
Step 1: Identify Your Honeywell Thermostat Model
Before adjusting anything, you need to know what you are working with. Honeywell thermostats fall into five broad categories, and the correct steps for each are meaningfully different. The model number is printed on a label on the back of the thermostat (lift or pull off the faceplate) or, on programmable models, often in the system information menu. Here is how to identify which category yours falls into:
- Large circular housing
- Physical rotating dial for temp
- No display, no buttons, no battery
- Lever or sub-dial for mode
- Small LCD display (no backlight)
- Arrow up/down buttons only
- No scheduling capability
- Runs on batteries
- LCD display with backlight
- Physical buttons including Schedule
- 5-1-1 or 7-day programming
- No Wi-Fi
- Colour or monochrome touchscreen
- Tap-to-adjust interface
- May or may not have Wi-Fi
- Menu-based programming
- Wi-Fi connected to Resideo/Honeywell Home app
- App control from anywhere
- Geofencing, learning, remote sensors
- Alexa / Google / HomeKit support
Quick Temperature Change: The Fastest Method on Any Honeywell Model
Before getting into model-specific details, here is the universal fastest method to simply make your home warmer or cooler right now, regardless of which Honeywell thermostat you have:
- Mechanical dial: Rotate the dial clockwise to increase temperature, counterclockwise to decrease. The temperature scale around the outer ring shows the setpoint. Turn to your desired temperature and stop.
- Basic digital / non-programmable: Press the UP (▲) arrow to increase setpoint, DOWN (▼) arrow to decrease. Each press typically moves the setpoint by 1°F. Hold the button to move faster.
- Programmable (RTH): Press UP or DOWN arrows. The display shows the new setpoint. This creates a temporary hold — the setpoint stays until the next scheduled period kicks in.
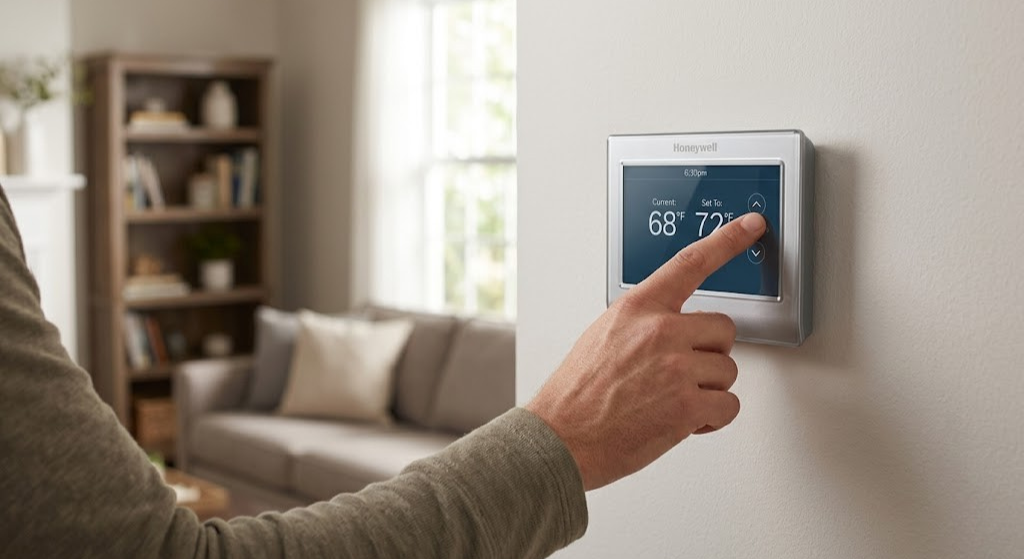
- Touchscreen models: Tap the temperature displayed on screen (it usually has a + or – beside it, or tap directly on the number). Use on-screen arrows to adjust. Confirm if prompted.
- Smart / Wi-Fi models: Either use the physical arrows or touchscreen on the device itself, OR open the Honeywell Home app, tap your thermostat, and drag the temperature slider or tap the +/- icons.
Adjusting the Mechanical Round Dial (T87 and Similar)
The Honeywell Round thermostat is the most straightforward device in the lineup — and in many ways, the most satisfying. There are no menus, no buttons, no software. Just a dial and a lever.
Adjusting the Temperature
- Locate the large outer ring or inner dial — depending on your exact model, either the entire housing rotates or there is a separate inner dial. Grasp it firmly.
- Rotate clockwise to increase the target temperature, counterclockwise to decrease it. The temperature scale printed around the edge shows your setpoint.
- Stop rotating when the indicator pointer or notch aligns with your desired temperature. The system will begin heating (or stop heating/cooling) as appropriate within a few minutes.
Adjusting the System Mode Lever
Many round dial models have a small lever or slide on the side or face of the housing that selects the system mode. Common positions:
- HEAT: System runs the heater when temperature drops below setpoint
- COOL: System runs the air conditioner when temperature rises above setpoint
- OFF: System does not run regardless of temperature
- FAN: On some models, a second lever controls the fan (AUTO or ON)
The Mechanical Thermostat’s One Limitation
The round dial has no scheduling capability. It maintains whatever temperature you set, 24 hours a day, 7 days a week. If you want a lower temperature while you sleep and a warmer house when you wake up, you have to adjust it manually every time — or replace it with a programmable model. If you are still running an old mechanical round dial, replacing it with a basic $30–$50 programmable Honeywell can pay back its cost in energy savings within a single heating season.

Honeywell Home RTH7560E — The Smart Upgrade from an Old Dial
7-day programming, large backlit display, clear menu navigation. Replace that mechanical round dial and start saving on energy bills automatically.
🛒 Check Price on AmazonBasic Digital Non-Programmable Models (CT31, CT41, and Similar)
Basic digital Honeywell thermostats have a small LCD display and two or three physical buttons. They are digital replacements for the mechanical dial — simple, reliable, and limited to a single setpoint with no scheduling capability.
Adjusting the Temperature
- Press the UP (▲) button to increase the setpoint by 1°F per press, or hold it down to move faster. The display shows the current setpoint temperature, which changes as you press.
- Press the DOWN (▼) button to decrease the setpoint.
- Release the button when you reach your desired temperature. The system will respond within 3–5 minutes.
Changing the System Mode
Most basic digital models have a SYSTEM switch (HEAT / OFF / COOL) and a FAN switch (AUTO / ON) — either physical slide switches or a button that cycles through options. Toggle these to select your desired operating mode. When set to HEAT, the thermostat controls the furnace. When set to COOL, it controls the air conditioner. OFF suspends all HVAC operation.
Programmable RTH Models: Temperature, Modes, and Schedules
The Honeywell RTH series is the most widely installed thermostat in North America. If you have a programmable Honeywell with physical buttons and a backlit LCD display, you almost certainly have an RTH model. Common examples include the RTH2300, RTH6350, RTH7560, and RTH8580. These follow similar interfaces with minor variations.
Manual Temperature Adjustment on RTH Models
- Press the ▲ or ▼ arrow buttons on the face of the thermostat. The setpoint temperature on the display changes with each press.
- The thermostat automatically enters a temporary hold — the display may show “Hold” or the override temperature. The system will maintain this temperature until the next programmed schedule period begins.
- To cancel the hold and return to the normal schedule immediately, press the Run Schedule or Cancel Hold button (typically labeled, or may require holding the ▲▼ together on some models).
Switching System Modes on RTH Models
RTH models typically have a physical SYSTEM button that cycles through HEAT → COOL → AUTO → OFF (or a subset of these depending on the model’s configuration for your HVAC system type). Press SYSTEM to advance through modes. The current mode is displayed on the LCD.
The AUTO mode allows the thermostat to switch between heating and cooling automatically to maintain a comfortable temperature range — useful in climates where both heating and cooling are needed on the same day. Most Honeywell programmable models also allow you to set a minimum temperature differential between the heating setpoint and cooling setpoint when in AUTO mode, preventing the system from rapidly alternating between modes.
Adjusting the Fan Setting
The FAN button cycles through AUTO and ON (and sometimes CIRCULATE on more advanced models). AUTO runs the fan only when heating or cooling is active. ON runs the fan continuously regardless of whether the system is conditioning air. Circulate mode (where available) runs the fan periodically for air circulation and filtration without continuous operation.
| RTH Button | Function | What Happens |
|---|---|---|
| ▲ / ▼ Arrows | Setpoint adjustment | Changes target temperature; creates temporary hold |
| SYSTEM | Mode selection | Cycles: HEAT → COOL → AUTO → OFF |
| FAN | Fan/blower control | Cycles: AUTO → ON (→ CIRC on some models) |
| SCHEDULE / SET | Enter programming mode | Opens schedule programming interface |
| HOLD / RUN | Override control | Creates permanent hold or returns to schedule |
| BACKLIGHT | Display illumination | Turns on backlight for 5–10 seconds |
| ◀ / ▶ (some models) | Time/day navigation in menus | Moves through schedule programming days |
Touchscreen Honeywell Models: T4R, RTH9585, VisionPRO 8000, and Similar
Honeywell’s touchscreen programmable models offer the same scheduling capability as button-based RTH models but with a more intuitive tap-based interface. The most common models you are likely to encounter are the RTH9585WF, T4R, RTH8580, and the commercial VisionPRO series.
Adjusting Temperature on a Honeywell Touchscreen
- The home screen displays the current room temperature and the setpoint temperature. The setpoint is typically shown with a small + or − icon beside it, or the number itself is tappable.
- Tap the + icon to increase the setpoint, or − to decrease. Some models display up/down chevrons instead.
- Each tap moves the setpoint by 1°F. Hold your finger on the icon for faster movement.
- The thermostat confirms the new setpoint after a few seconds of inactivity. Look for “Temporary Hold” or a similar indicator showing the override is active.
Navigating the Touchscreen Menu System
Touchscreen Honeywell models use a hierarchical menu accessed from a MENU button on the home screen. From the main menu, you can access Schedule, System (mode selection), Fan, and Settings. Schedule programming on touchscreen models is significantly easier than on button-based models — you tap a time period, drag or tap to adjust the setpoint, and move to the next period. The visual display of the schedule makes it much clearer whether your programming is doing what you intend.

Honeywell Home T9 — Adjust From Anywhere, Room Sensors Included
Control from the Honeywell Home app. Geofencing keeps your home at the right temperature before you arrive. Room sensors solve hot/cold spots automatically.
🛒 Check Price on AmazonSmart Wi-Fi Honeywell Thermostats: T6 Pro, T9, T10 Pro, and RTH9000
Smart Honeywell thermostats can be adjusted two ways: directly on the thermostat itself (same as a touchscreen model), or remotely through the Honeywell Home app. The app experience is the primary intended interface for daily use, while the physical controls serve as a backup and for on-the-spot adjustments.
Adjusting the T6 Pro Directly on the Thermostat
The T6 Pro has a backlit LCD display with physical up/down buttons — similar to the RTH series. Press ▲ or ▼ to change the setpoint. The display shows “Temporary Hold” indicating the manual override. To return to the normal schedule, press the Run Schedule button. The T6 Pro is intentionally simple to operate physically — unlike some touchscreen models, it requires no menu navigation for a basic temperature adjustment.
Adjusting the T9 / T10 Pro on the Device
The T9 and T10 Pro have colour touchscreens. Tap the setpoint temperature on the home screen, then use the + and − buttons that appear. The thermostat shows a “Temporary Hold Until [next schedule period]” notification. Tapping the Hold Until time lets you extend the hold or make it permanent.
Remote Adjustment via Honeywell Home App
- Open the Honeywell Home app on your smartphone (available for iOS and Android).
- Select your thermostat from the home screen. The current temperature and setpoint are displayed immediately.
- Tap the temperature shown as the setpoint, or use the + and − buttons that appear. Drag the circular temperature slider if your app version uses that interface.
- The app sends the new setpoint to the thermostat over Wi-Fi. Confirmation typically appears within 5–10 seconds. If your thermostat is unreachable (no Wi-Fi connection), the app will show a warning and the adjustment will not take effect.
- To make the change permanent (override the schedule), look for the Hold option in the app and select it before confirming the temperature change.
Honeywell Home App & Lyric App: Remote Control Explained
Honeywell’s app-based control has gone through several iterations. The original Lyric app has been replaced by the Honeywell Home app for most current models, though some older Lyric thermostats may still use the legacy platform. Here is a clear guide to both.
Honeywell Home App (Current Platform — T6, T9, T10, RTH9000 Series)
The Honeywell Home app is the primary remote control interface for all current Honeywell smart thermostats. Once your thermostat is connected to the app, you can adjust the temperature from anywhere with internet access. The app’s home screen shows all registered thermostats with their current readings. Tap a thermostat to open its full control panel, which shows current temperature, humidity (if the model includes a humidity sensor), setpoint, mode, and fan status.
The schedule view in the Honeywell Home app presents your programming visually — each day of the week shown with time blocks colour-coded to setpoint temperatures. Editing a schedule period is as simple as tapping the block and adjusting the time and setpoint values.
Geofencing: Let the App Adjust Temperature Automatically
Smart Honeywell models with geofencing capability — T6 Pro, T9, T10 Pro — can automatically switch to energy-saving Away mode when your phone leaves a set radius around your home, and restore comfortable temperatures when you return. Setting this up in the Honeywell Home app takes about two minutes: go to Settings → Geofencing → Enable, set your home address, and choose your Away setpoint temperatures. No manual adjustment needed for routine daily departures.
Voice Control Adjustment
Connected smart Honeywell thermostats can be adjusted through voice commands:
- Amazon Alexa: “Alexa, set the thermostat to 70 degrees” — or “Alexa, make it warmer”
- Google Assistant: “Hey Google, set the temperature to 68” — or “What’s the thermostat set to?”
- Apple Siri (T9/T10 with HomeKit): “Hey Siri, set the hallway thermostat to 72”
Programming a Full 7-Day Schedule: Step-by-Step
The single most impactful adjustment you can make to any Honeywell programmable or smart thermostat is setting up a proper 7-day schedule. A well-designed schedule runs the HVAC system efficiently while your home is occupied and reduces energy use automatically when it is not — without any manual interaction. Here is the universal process.
Typical Recommended Schedule Structure
| Time Period | Typical Time | Heating Setpoint | Cooling Setpoint | Rationale |
|---|---|---|---|---|
| Wake | 6:00 – 8:00 AM | 68–70°F | 76–78°F | Comfortable for morning routines |
| Leave | 8:00 AM – 5:00 PM | 60–62°F | 82–85°F | Maximum savings while home is empty |
| Return | 5:00 – 10:00 PM | 68–70°F | 76–78°F | Comfortable for evening hours |
| Sleep | 10:00 PM – 6:00 AM | 65–66°F | 78–80°F | Optimal sleep temperature (cooler is better) |
Programming the Schedule on RTH Button-Based Models
- Press the SCHEDULE (or SET SCHEDULE) button. The display enters schedule programming mode and shows the first programming period — usually Monday Wake or Day 1 Period 1.
- Use the ◀ / ▶ arrows to move between days or the ▲ / ▼ arrows to change the time for the current period. Set the time when this period should begin.
- Press ▲ / ▼ to set the heating setpoint for this period. Press a navigation button or wait for the cursor to advance to the next field.
- Set the cooling setpoint for this period (if applicable).
- Advance to the next period (Leave, Return, Sleep) and repeat steps 2–4.
- Continue through all days. On 5-1-1 models, Monday through Friday share a single weekday schedule. On 7-day models, each day is set individually.
- Press DONE or allow the thermostat to exit programming automatically after a period of inactivity. The thermostat will now follow the schedule.
Fan Settings: Auto, On, and Circulate Explained
The fan setting on any Honeywell thermostat controls when the HVAC system’s blower motor runs — independent of heating or cooling. Getting this setting right has a real impact on both comfort and energy consumption.
Auto Mode (Recommended for Most Homes)
In AUTO mode, the fan runs only when the system is actively heating or cooling. When the thermostat is satisfied — room temperature has reached the setpoint — the fan stops. Auto mode is the most energy-efficient setting and the one Honeywell recommends as the default for most residential situations. The trade-off is that air circulation and filtration only happen during conditioning cycles.
On Mode (Continuous Fan)
In ON mode, the blower runs continuously regardless of whether the system is heating or cooling. This provides constant air circulation and filtration — useful for homes with allergy sufferers, smokers, or pets. The downside is energy cost: a standard PSC blower motor might add $10–$20 per month to your electricity bill when running continuously. An ECM variable-speed motor (found in higher-efficiency furnaces) uses significantly less power in continuous mode and makes the “always on” option more economically viable.
Circulate Mode (Available on Select RTH and Smart Models)
Circulate mode runs the fan for a set number of minutes per hour — typically 15–45 minutes — regardless of conditioning cycles. This is a middle path between Auto (no circulation between calls) and On (always running). On smart models like the T9, the circulate run time is configurable in the app settings. Circulate is the best overall choice for homes that want improved air filtration without the full energy cost of continuous operation.
Heat, Cool, Auto, and Emergency Heat: Mode Selection Guide
Every Honeywell thermostat offers multiple system modes. Understanding what each mode does prevents frustration and potential equipment issues.
| Mode | What It Does | When to Use It | What to Avoid |
|---|---|---|---|
| HEAT | Activates heating system when temp falls below setpoint | Winter, any time you need heat | Do not use if outdoor temp is above 65°F and cooling is needed |
| COOL | Activates AC/compressor when temp rises above setpoint | Summer, humid days needing dehumidification | Do not use below 55°F outdoor — damages compressor |
| AUTO | Automatically switches between heat and cool as needed | Shoulder seasons with wide temperature swings | Set adequate deadband (4°F+) to prevent rapid mode switching |
| OFF | No heating or cooling — fan may still run | Mild weather, open-window days | Do not leave on OFF during extreme cold (pipe freeze risk) |
| EMERGENCY HEAT | Heat pump systems only — bypasses compressor, runs backup electric strips only | When heat pump fails in freezing temperatures | Very expensive to run — emergency use only |
Hold and Temporary Override: What They Mean and When to Use Each
One of the most misunderstood aspects of programmable Honeywell thermostats is the relationship between manual adjustments, temporary holds, and permanent holds. Getting this right makes the difference between a thermostat that genuinely saves energy and one that runs at comfort temperature around the clock because its schedule is constantly being overridden.
Temporary Hold (Override Until Next Period)
When you press the ▲ or ▼ arrows on most Honeywell programmable models without pressing anything else, you create a temporary hold. The thermostat maintains your manually-set temperature until the next scheduled transition period. For example, if the current period is “Leave” with a 62°F setpoint and you raise it to 68°F, the thermostat stays at 68°F until the scheduled “Return” period begins — at which point the normal schedule resumes. This is the most common and appropriate type of hold for day-to-day adjustments.
Permanent Hold (Hold Indefinitely)
Pressing the HOLD button (or selecting “Permanent Hold” in the menu) sets the thermostat to maintain the current setpoint indefinitely — the schedule is suspended entirely. This is useful for extended stays at home during illness, unexpected schedule changes, or when you want to override the schedule for several days. The schedule remains stored and resumes as soon as you press “Run Schedule” or “Cancel Hold.”
A common mistake: homeowners set a permanent hold during a vacation and forget to cancel it when they return. The thermostat runs at the vacation hold temperature indefinitely — sometimes a year or more — until someone notices and cancels the hold. If your Honeywell thermostat seems to not be following the schedule you programmed, check whether it is in permanent hold mode first. This is covered in more detail in our 10-minute thermostat diagnostic checklist.
Vacation Hold on Smart Models
Smart Honeywell models (T9, T6 Pro) include a dedicated Vacation Hold or Away mode in the app. This lets you set a start and end date for a specific away setpoint — then the normal schedule automatically resumes when the vacation period ends. This is meaningfully better than a manual permanent hold because it self-cancels, preventing the common problem of returning from a trip and forgetting to restore normal programming.
Thermostat Won’t Adjust: Common Problems and Fixes
When pressing buttons or tapping the screen produces no result — or the system does not respond to setpoint changes — it is frustrating but almost always diagnosable. Here are the most common causes and their solutions.
Dead or Low Batteries
This is the most common reason a Honeywell thermostat suddenly stops responding to adjustments. When battery voltage drops below operating threshold, the display may appear normal (some charge remains) but button presses are not processed reliably. Replace the batteries with fresh name-brand alkaline cells. For a complete guide on battery replacement across all Honeywell models, see how to replace the battery in a Honeywell thermostat.
Keypad Locked
If the thermostat displays a padlock icon when you press buttons, the keypad is locked. Enter the four-digit PIN to unlock (default PIN is often 1234 or 0000 on freshly installed units). If the PIN was changed and is not known, most RTH models can be reset to factory defaults — which clears the lock — by removing the batteries and holding a reset button for 5 seconds, then reinstalling batteries.
Thermostat in Hold Mode
A permanent hold can make it appear that schedule adjustments have no effect. If the display shows “Hold” permanently, the schedule is suspended. Press “Run Schedule” or “Cancel Hold” to restore schedule operation.
Wi-Fi Thermostat Shows “Offline”
Smart Honeywell thermostats that lose Wi-Fi connectivity still control the HVAC locally, but app-based adjustments will not work until connectivity is restored. If the app shows “Offline,” the thermostat is not reachable — check your router’s status, verify the thermostat’s Wi-Fi settings, or power-cycle both the thermostat and router. The thermostat will continue following its local schedule even while offline.
HVAC Does Not Respond Despite Correct Thermostat Adjustments
If the thermostat appears to accept adjustments and shows the new setpoint but the furnace or AC does not respond, the issue is likely not the thermostat itself. Common causes include a blown fuse on the furnace control board, a tripped circuit breaker, or a wiring problem. Our guide on thermostat clicks but HVAC won’t start covers this systematic diagnosis.
Temperature Seems Wrong: Why It Reads Incorrectly and What to Do
A Honeywell thermostat that reads a temperature significantly different from what you are experiencing is one of the most common comfort complaints. The cause is usually one of four things:
Placement Near a Heat or Cold Source
If the thermostat is near a supply air register, a sunny window, a kitchen, or an exterior wall in an uninsulated location, it will read the local temperature around it — not the representative temperature of the room. A thermostat near a cold exterior wall might read 62°F while the main living area is 68°F, causing over-heating. Relocating the thermostat to an interior wall, away from registers and windows, is the correct long-term fix.
Sensor Drift Over Time
Thermistors — the temperature sensors in electronic thermostats — can drift over years of operation, reading increasingly inaccurately compared to the actual ambient temperature. Minor drift (1–2°F) can be corrected with the calibration offset in the installer menu. Drift beyond 3°F that cannot be fully corrected suggests sensor degradation that warrants replacement.
Air Infiltration Through the Wall Cavity
If there is an open air gap in the wall cavity behind the thermostat (around the wire pass-through hole), cold or warm air from inside the wall can reach the thermostat’s sensor, causing false readings. Sealing the gap with a small amount of non-expanding foam sealant resolves this. This is especially common in older homes and in thermostats mounted on exterior walls.
✅ Easy Fixes for Wrong Temperature Readings
- Apply calibration offset in installer menu (±3°F)
- Seal wall cavity gap with foam around wires
- Move thermostat away from registers/windows
- Clean dust off the sensor with compressed air
⚠️ Signs the Problem Needs More Attention
- Reading off by more than 3°F consistently
- Reading varies wildly throughout the day
- Offset correction does not hold
- Problem appeared suddenly (not gradual drift)

Honeywell Home RTH2300B — Simple to Program, Simple to Adjust
Clear buttons, backlit display, 5-2 day programming. Perfect if you want scheduling without the complexity. Replaces most older Honeywell models with zero wiring changes.
🛒 Check Price on AmazonGetting the Most Energy Savings From Your Honeywell Thermostat Settings
Adjusting the temperature is the most basic interaction you can have with your thermostat. Adjusting it strategically — based on when your home is occupied, what outdoor conditions are doing, and how your specific HVAC system responds — is what separates a thermostat that runs efficiently from one that simply maintains a number on a screen.
The 7–10 Degree Setback Rule
The Department of Energy and ENERGY STAR both point to setback temperature as the highest-impact energy saving strategy available through thermostat adjustment. The principle: reduce heating setpoint by 7–10°F during the 8 hours you are typically away at work, and during the 8 hours you are typically asleep. Applied consistently, this one adjustment can reduce your annual heating bill by 5–15% — approximately $75–$250 for a typical home. The reason: building heat loss is proportional to the difference between indoor and outdoor temperature. A cooler indoor temperature during unoccupied hours loses heat more slowly, and the energy cost to maintain that lower temperature is meaningfully less than maintaining comfort temperature.
Setback vs. Full Off: Why Not Just Turn It Off?
A common question: if setback saves energy, why not turn the system completely off overnight and let the house cool to outdoor temperatures? The answer involves the thermal mass of your home and recovery time. Allowing a home to cool dramatically overnight in winter requires a significant reheating cycle in the morning — potentially running the furnace at full capacity for 2–3 hours. The energy cost of that recovery can exceed the savings from the overnight off-period, depending on your climate, home insulation, and furnace efficiency. A setback to 62–65°F maintains a partial thermal buffer that allows a much faster, lower-cost recovery than full shutdown. For vacation periods of 3 or more days, a lower setpoint of 55–58°F (frost protection mode) is appropriate.
Avoiding Override Habits That Eliminate Savings
The most common reason programmable thermostats fail to deliver promised energy savings is not a technical problem — it is a behavioral one. Homeowners who manually override their schedules more than 3–4 times per week — typically by setting a hold when they feel too warm or too cold — eliminate most of the savings the schedule was designed to create. If you find yourself constantly overriding the schedule, the schedule setpoints are not calibrated to your actual comfort preferences. Spend 20 minutes adjusting the scheduled setpoints to temperatures you are comfortable with rather than repeatedly creating holds that defeat the schedule’s purpose.
Smart Thermostat Adjustment Strategies
Smart Honeywell thermostats offer energy-saving features that go beyond simple scheduling. Geofencing automatically applies your Away setback when everyone leaves the house — without requiring anyone to remember to change the thermostat manually. The T9 and T10 Pro track runtime and humidity, adjusting cooling operation to balance temperature and humidity simultaneously rather than overcooling for humidity control. The Honeywell Home app shows energy usage patterns that make it easy to identify whether your current settings are achieving the efficiency you intend. If the app shows frequent long heating runs during hours when the house should be in setback, the hold settings or schedule programming likely need adjustment.
Honeywell Model Quick Reference: Adjustment Steps at a Glance
Use this at-a-glance reference when you are standing in front of an unfamiliar Honeywell thermostat and need the fastest possible guidance. Find the model category that matches what you are looking at and follow the steps.
| Model Type | Temp Adjustment | Mode Change | Access Schedule | Cancel Override |
|---|---|---|---|---|
| Round Dial (T87) | Rotate dial | Move lever (HEAT/COOL/OFF) | N/A — no schedule | N/A |
| Basic Digital (CT31/41) | ▲ / ▼ buttons | SYSTEM slide switch | N/A — no schedule | N/A |
| RTH Programmable | ▲ / ▼ buttons | Press SYSTEM button (cycles modes) | Press SCHEDULE or SET SCHEDULE | Press RUN or CANCEL HOLD |
| Touchscreen (RTH9585 etc.) | Tap + / − on screen | Tap MENU → System Mode | Tap MENU → Schedule | Tap “Run Schedule” on home screen |
| T6 Pro (Smart) | ▲ / ▼ buttons on device or app | Device menu or app MODE option | App → Schedule tab | Press RUN SCHEDULE or app Cancel Hold |
| T9 / T10 Pro (Smart) | Touchscreen + / − or app slider | App MODE option or touchscreen menu | App → Schedule tab | App Cancel Hold or touchscreen menu |
The One Thing to Check Before Calling for Service
Before concluding that your Honeywell thermostat is broken and calling an HVAC technician, run through this quick four-point verification sequence. It resolves the majority of “my thermostat isn’t working” situations without any technical intervention:
- Check the batteries. Replace them with fresh name-brand cells regardless of whether the low-battery warning has appeared. A thermostat behaving erratically or unresponsively is very often a battery problem.
- Check whether it is in Hold mode. If the display shows “Hold” or “Permanent Hold,” the schedule is suspended. Press Run Schedule or Cancel Hold to restore normal operation.
- Check the mode setting. Confirm the thermostat is in the correct mode (HEAT in winter, COOL in summer, not OFF or accidentally set to the opposite mode).
- Check the HVAC system directly. Go to the furnace or air handler and verify the power switch is on, the filter is not completely blocked (a severely blocked filter causes safety shutoffs), and the circuit breaker has not tripped. A thermostat that appears to call for heating but gets no response is usually a downstream issue, not a thermostat problem.
Frequently Asked Questions: Adjusting Honeywell Thermostats
How do I make my Honeywell thermostat warmer right now?
On a mechanical round dial: rotate the dial clockwise to a higher temperature. On any digital or programmable model: press the ▲ (up) arrow button until the setpoint reaches your desired temperature. On touchscreen models: tap the + icon or the setpoint number on screen. On smart models (T6, T9): either use the arrows/screen on the device, or open the Honeywell Home app and tap the + button. The system will begin heating within 3–5 minutes.
Why isn’t my Honeywell thermostat responding when I press the buttons?
The three most common causes are: dead or very low batteries (replace with fresh name-brand alkaline cells), keypad lockout (look for a padlock icon — requires a PIN to unlock), or the thermostat is wired to a C-wire power source that has been interrupted. If none of these apply, hold the reset button for 5 seconds with batteries removed to factory reset the device.
What does “Hold” mean on my Honeywell thermostat?
Hold means the thermostat is maintaining a manually-set temperature and has suspended its normal schedule. A temporary hold lasts until the next scheduled period. A permanent hold lasts indefinitely until you press “Run Schedule” or “Cancel Hold.” If your thermostat seems to ignore the schedule you programmed, check whether it is stuck in permanent Hold mode — this is one of the most common causes of thermostats that “don’t follow the schedule.”
How do I change from Celsius to Fahrenheit on a Honeywell thermostat?
This is typically found in the installer or advanced settings menu. Access the menu by pressing and holding a button combination specific to your model (check the installation manual for the exact combination — common ones are holding ▲+▼ together for 5 seconds, or holding FAN+SYSTEM for 5 seconds). Inside the menu, look for a C/F or Temperature Display option and toggle it. On smart models, the unit setting is usually in the app Settings → Preferences → Temperature Unit.
Can I adjust my Honeywell thermostat from my phone?
Yes, if you have a Wi-Fi enabled smart Honeywell model (T6 Pro, T9, T10 Pro, RTH9000 series, or Lyric T5/T6). Download the Honeywell Home app (iOS or Android), create a Resideo account, and add your thermostat using the on-screen setup process. Once connected, you can adjust temperature, change modes, edit schedules, and view energy usage from anywhere with an internet connection on your phone.
My Honeywell thermostat is set to 72 but the house feels too cold — what is wrong?
Several possibilities: (1) The thermostat is in a location reading warmer than your living area — near a heat source, in a sunny spot, or in a room that heats faster than where you spend time. The thermostat satisfies at 72°F before your main areas reach that temperature. (2) The thermostat is in permanent Hold mode at a lower temperature and the schedule is overriding your expectation. (3) The HVAC system is undersized or has an issue — the thermostat is calling for heat, but the furnace or heat pump cannot maintain the setpoint in very cold weather. Check what mode the thermostat is in and whether it shows an active heating call.
How do I lock my Honeywell thermostat so others cannot change it?
Access the installer/advanced settings menu (button combination specific to your model) and look for a “Lockout,” “Keypad Lock,” or “Keypad Security” option. You can typically set a 4-digit PIN and choose between full lockout (no changes at all) or partial lockout (allows temperature adjustment within a set range but prevents schedule or mode changes). On smart models, the Honeywell Home app includes a lockout option in Settings → Thermostat Settings.
How do I reset my Honeywell thermostat to factory settings?
The factory reset process varies by model. On most RTH battery-powered models: remove the batteries, press and hold the reset button (small pinhole button or specific button combination) for 5 seconds, then reinstall batteries. On the T6 Pro: go to Settings → Reset → Factory Reset in the menu. On the T9 and T10 Pro: go to Settings → Reset → Factory Reset in the touchscreen menu or via the app. Note that a factory reset clears all schedules, Wi-Fi settings, and personalized configuration — you will need to set everything up again from scratch.
Why does my Honeywell thermostat show a number but the HVAC is not running?
If the thermostat display works normally but the furnace or AC does not respond, the problem is almost certainly not the thermostat itself — it is downstream. Check the furnace’s power switch (looks like a light switch on the wall near the furnace), the circuit breaker for the HVAC system, and whether the thermostat is actively calling for heating/cooling (look for a flame or snowflake icon on the display, indicating a call is active). A blown 3–5 amp fuse on the furnace control board is a common cause that can be confirmed and fixed in minutes. Our guide on thermostat clicks but HVAC won’t start covers this step by step.
What is the best temperature setting for a Honeywell thermostat in winter?
The ENERGY STAR recommended settings are: 68°F while home and awake, 60°F while away at work, and 65°F at night while sleeping. These settings balance comfort and energy savings. The key is consistency — a thermostat that runs 68°F all day and night versus one programmed to setback to 60°F for 9 hours saves approximately 5–10% on heating costs annually. If 60°F feels too cold for an 8-hour setback, 64°F still delivers meaningful savings over no setback at all.
Your Honeywell Thermostat, Fully Under Control
From rotating a round dial to building a 7-day schedule in the Honeywell Home app — every adjustment is simpler once you know the logic behind your specific model. The temperature, the mode, the schedule, the fan, the hold settings: each one is designed to work together to keep your home comfortable while using your HVAC system as efficiently as possible.
🛒 Shop Honeywell Thermostats on Amazon


