How to Add Your Nest Thermostat to Apple Home
Whether you have the latest Nest Learning Thermostat or an older model, here is exactly how to get it working in the Apple Home app — with Siri, automations, and remote access included.
Why Google Nest and Apple Home Don’t Just Work Together Out of the Box
Google and Apple run competing smart home ecosystems, and for most of their histories they have kept their walls firmly up. Nest thermostats were built for Google Home and Google Assistant. Apple HomeKit was designed around its own certified device standard. For years, the only way to bridge the two involved third-party hacks, Raspberry Pi servers, or bridge devices — none of which were elegant or reliable.
That changed when Matter arrived. Matter is an open smart home standard developed collaboratively by Apple, Google, Amazon, Samsung, and others, specifically to solve the cross-ecosystem problem. A Matter-certified device can be added to Apple Home, Google Home, and Amazon Alexa simultaneously, without any special bridge hardware. Google has implemented Matter support in select Nest thermostat models, which means those models can now live natively in your Apple Home app — appearing alongside your HomeKit lights, locks, and sensors as a first-class accessory.
The catch is compatibility. Only specific Nest thermostat models support Matter, and the older Nest Learning Thermostats (1st through 3rd generation) and the Nest Thermostat E are not included. If you have one of those older models, the best solution is a Starling Home Hub — a dedicated bridge device designed specifically for this use case. This guide covers all three paths in full detail.
Native connection for 2020 Nest Thermostat and 4th-gen Nest Learning Thermostat. No extra hardware needed.
Plug-and-play bridge device supporting all Nest thermostat models including older generations.
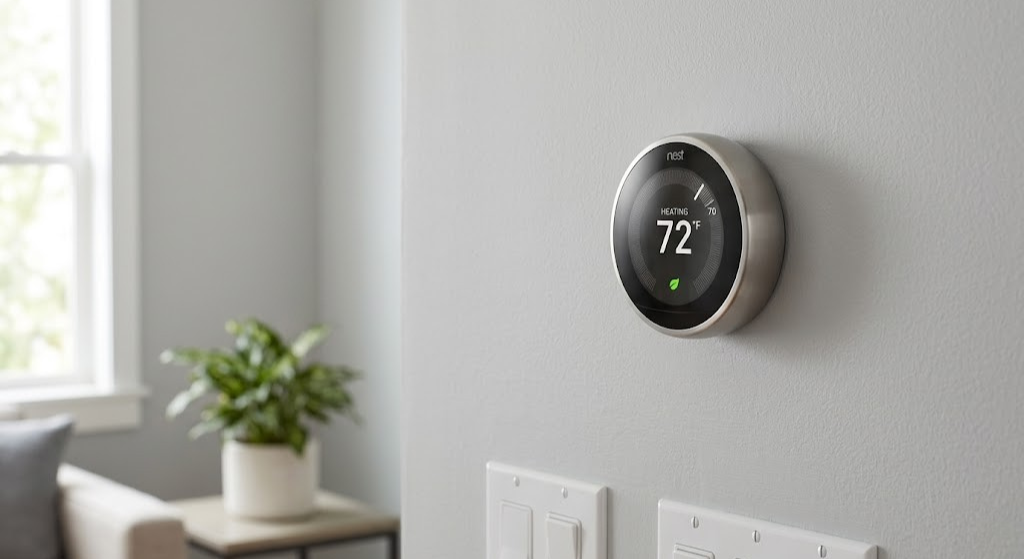
“Hey Siri, set the thermostat to 70 degrees” — full voice control once added to Apple Home.
Include your thermostat in HomeKit scenes and automations alongside all your other Apple accessories.
Matter setup uses a one-time QR code generated in Google Home and scanned in Apple Home.
After adding to Apple Home, your thermostat continues to work in the Google Home app simultaneously.
Step Zero: Check Your Thermostat’s Compatibility
Before doing anything else, identify exactly which Nest thermostat model you have. The method you use — and whether you need to spend any money at all — depends entirely on this. Look at the back of your thermostat or check the Google Home app for the model name.
| Nest Model | Matter Support | HomeKit Method | Cost |
|---|---|---|---|
| Nest Learning Thermostat 4th Gen (2024) | ✓ Yes | Matter — direct or via Google Home | Free |
| Nest Thermostat (2020) | ✓ Yes | Matter via Google Home app | Free |
| Nest Learning Thermostat 3rd Gen | ✗ No | Starling Home Hub | ~$99 |
| Nest Learning Thermostat 2nd Gen | ✗ No | Starling Home Hub | ~$99 |
| Nest Learning Thermostat 1st Gen | ✗ No | Starling Home Hub | ~$99 |
| Nest Thermostat E | ✗ No | Starling Home Hub | ~$99 |
Open the Google Home app → tap your thermostat → tap Settings (gear icon) → scroll to Technical info. The model name appears here. Alternatively, check the original box or the label on the back of the thermostat base.
What You Need Before Starting (All Methods)
- iPhone or iPad running iOS 16.4 or later — required for Matter accessory support in Apple Home.
- Apple Home Hub — an Apple TV 4K (any generation), HomePod, or HomePod mini. Required for remote access, automations, and Siri commands when away from home. Without this, you can control the thermostat locally but lose most of the smart features.
- Stable home Wi-Fi — the thermostat, your iPhone, and your Google Matter Controller must all be on the same network during setup.
- Google Home app (for the Matter methods) — your Nest thermostat must already be set up in Google Home before you can add it to Apple Home.
For the Matter method specifically, you also need a Google Matter Controller on your network. Compatible devices include the Nest Hub (2nd gen), Nest Hub Max, Nest Wi-Fi Pro, and Google Home speakers with a compatible hub. If you only have a standalone Google Home Mini or similar speaker without a hub, check Google’s compatibility list to confirm.

Native Matter support lets it pair directly with Apple HomeKit. Soli radar presence sensing, HVAC health monitoring, and works simultaneously in Google Home and Apple Home.
🛒 Check Price on AmazonMethod 1: Matter via Google Home App (2020 Nest Thermostat)
This is the official, no-cost method for the 2020 Nest Thermostat. It uses the Matter smart home standard to connect your thermostat to Apple HomeKit through a pairing code generated in the Google Home app. Your thermostat will continue to work in Google Home after pairing — Matter allows devices to belong to multiple ecosystems at once.
- Your Nest Thermostat must be on software version 1.3 or later (check in Google Home → device Settings → Technical info)
- Google Home iOS app must be version 3.1.108 or later
- Bluetooth must be enabled on your iPhone during setup
- A Google Matter Controller (Nest Hub 2nd gen, Nest Hub Max, Nest Wi-Fi Pro) must be on your network
Launch the Google Home app on your iPhone. Tap Devices and select your Nest Thermostat from the device list.
Tap the Settings icon (gear icon) in the top-right corner of the thermostat’s detail screen.
Scroll down in the settings menu until you see Linked Matter apps & services. Tap it. You will see a list of currently linked apps — by default, Google Home and Google Assistant are listed.
Tap Link apps & services. On the next screen, tap Share with QR code (or tap to generate a numeric pairing code — either works). Keep this screen open.
Open the Apple Home app. Tap the + button in the top-right corner, then tap Add Accessory. Your phone’s camera will activate, ready to scan a QR code.
Since you are entering a code from the Google Home app rather than scanning a physical label, tap More Options… at the bottom of the scanning screen. Your Nest Thermostat should appear under Nearby. Tap it.
Tap the blank code entry field. Paste or manually type the Matter pairing code from Google Home, then tap Continue. Apple Home will pair with the thermostat — this can take 30–90 seconds.
Choose which room the thermostat belongs to in your Apple Home layout, give it a name, and tap Continue. Your Nest Thermostat is now live in Apple Home.
The Matter pairing code generated in Google Home expires after a short window — typically a few minutes. Complete steps 5–7 quickly after generating the code. If pairing fails, simply return to Google Home and generate a fresh code.
Method 2: Direct Setup on Nest Learning Thermostat 4th Gen
The 4th-generation Nest Learning Thermostat introduced a more direct pairing path: it can display its own Matter QR code directly on the thermostat screen, which you scan straight from the Apple Home app. This method does not require generating a code inside Google Home and is generally more reliable than the code-exchange method above.
Press the thermostat toward the wall to open its menu. Navigate to Settings → Matter. The thermostat will display a QR code on its screen.
Open the Apple Home app, tap the + button, then tap Add Accessory. Point your iPhone camera at the QR code on the thermostat screen.
Apple Home will recognize the thermostat and walk you through room assignment and naming. Once complete, the thermostat appears as a native HomeKit accessory.
If you have not already added this thermostat to Google Home, open Google Home, tap Add, select Google Nest or Partner Device, then choose Matter Enabled Device and scan the same QR code. Both ecosystems will then control the thermostat simultaneously.
Some users encounter a failure at step 3 when pairing directly through Apple Home first. If this happens, try the alternative: set up the thermostat in Google Home first using the Matter Enabled Device option, then generate a pairing code from Google Home to add it to Apple Home (Method 1 above). This two-step approach is confirmed to work even when the direct scan method fails.
Method 3: Starling Home Hub (All Nest Models, Including Older Generations)
If you have a Nest Learning Thermostat 1st, 2nd, or 3rd generation, or a Nest Thermostat E, Matter is not an option. The cleanest solution is the Starling Home Hub: a small plug-in bridge device designed specifically to connect Nest devices to Apple HomeKit. It requires no Raspberry Pi, no continuous laptop, and no technical configuration beyond linking your Nest account.
The Starling Home Hub also works with Nest Protect smoke alarms and Nest cameras — so if you have a full Nest ecosystem, one hub covers the entire family of devices. Setup takes about five minutes.
Connect the Starling Home Hub to a power outlet using its included USB adapter. It needs to be within range of your home Wi-Fi — anywhere in the home works, it does not need to be near the thermostat.
On your iPhone, go to Settings → Wi-Fi and connect to the Starling Home Hub’s temporary setup network (it appears as “Starling-XXXX”). Open Safari and navigate to starlinghome.hub to reach the setup interface.
In the Starling setup interface, select your home Wi-Fi network and enter the password. The hub will connect and its status light will turn solid green.
The setup interface will prompt you to sign in with the Google account linked to your Nest devices. After signing in, Starling automatically discovers all compatible Nest devices on your account.
The Starling setup page displays a HomeKit pairing QR code and an 8-digit code. Open Apple Home → + → Add Accessory and scan the QR code. All your Nest devices will be imported as native HomeKit accessories.
One Starling Home Hub exposes all Nest devices on your account to HomeKit — not just the thermostat. Your Nest Protect smoke alarms appear as HomeKit smoke sensors, and cameras appear as HomeKit Secure Video cameras. For households with a full Nest ecosystem, the $99 price covers the entire setup.
After Setup: What You Can Do in Apple Home
Once your Nest thermostat appears in Apple Home, it functions as a native HomeKit thermostat — with the full range of Apple Home features available to any certified HomeKit device.
Useful Automations to Set Up Immediately
- Arrive home: When your location shows you approaching home, set the thermostat to your comfort temperature. Combines with smart locks, lights, and other accessories in the same automation.
- Leave home: When the last person leaves, automatically switch the thermostat to an eco setpoint to save energy while the house is empty.
- Bedtime scene: A “Good Night” scene that dims lights, locks doors, and sets the thermostat to your preferred sleeping temperature — triggered by a single Siri command or Home app button.
- Smoke alarm integration: If you have a HomeKit smoke detector, create an automation that turns off the thermostat’s fan when smoke is detected, preventing smoke from spreading through ducts.
Siri Commands That Work Out of the Box
- “Hey Siri, set the thermostat to 72 degrees.”
- “Hey Siri, what’s the temperature inside?”
- “Hey Siri, turn on the heat.”
- “Hey Siri, set the living room to cool mode.”
- “Hey Siri, increase the temperature by 2 degrees.”
Matter allows multi-ecosystem pairing. Your Nest thermostat will continue to appear and function in the Google Home app after being added to Apple Home. Changes made in either app are reflected immediately on the actual thermostat — and vice versa. You do not need to choose one ecosystem over the other.
Troubleshooting: When the Pairing Does Not Work
Matter pairing between Google Nest and Apple Home works reliably when prerequisites are met, but a handful of issues come up repeatedly in community forums. Here is how to resolve each one.
The most common cause is an expired pairing code. Return to Google Home, generate a fresh code, and immediately complete the Apple Home pairing steps within two minutes. Also ensure Bluetooth is enabled on your iPhone during the pairing process.
Your iPhone and thermostat must be on the same Wi-Fi network. Also confirm your Google Matter Controller (Nest Hub, etc.) is online and connected. Restart both the thermostat and the Google Matter Controller and try again.
Your thermostat has not yet received the Matter firmware update (version 1.3+). This update rolls out gradually — there is no way to force it. Check back in a few days, or contact Google Nest support to request an expedited update.
This typically means the Google Matter Controller dropped off the network. Restart your Nest Hub or Nest Wi-Fi Pro router. Also verify your Apple Home Hub (Apple TV or HomePod) is online. Both hubs must be active for the connection to remain stable.
If the 4th-gen Nest Learning Thermostat fails to pair after multiple attempts, the most reliable fix is: remove it from your Google account via thermostat Settings → Account, let it reset, then re-add it to Google Home by selecting “Matter Enabled Device” instead of “Thermostat.” Then generate a Matter code and add to Apple Home.
Some Matter pairing issues occur on 5 GHz networks. If you have a router that allows band selection, temporarily connect your thermostat and iPhone to the 2.4 GHz band during pairing. Once paired, you can return to 5 GHz for normal operation.
Method Comparison: Which Approach Is Right for You?
| Factor | Matter (2020 Thermostat) | Matter (Gen 4) | Starling Home Hub |
|---|---|---|---|
| Compatible Models | 2020 Nest Thermostat | 4th-gen Nest Learning | All Nest models |
| Cost | Free | Free | ~$99 |
| Setup Time | ~10 min | ~5 min | ~5–10 min |
| Extra Hardware | Google Matter Controller | Google Matter Controller | Starling Hub |
| Reliability | Good (occasional pairing issues) | Very Good | Excellent |
| Google Home Still Works | ✓ Yes | ✓ Yes | ✓ Yes |
| Covers Nest Protect / Cameras | ✗ No | ✗ No | ✓ Yes |
| Ongoing Dependency | Google Matter Controller online | Google Matter Controller online | Starling Hub online |
- Have a 4th-gen Nest Learning Thermostat? Use the direct Matter QR method — it is the fastest and most reliable path.
- Have the 2020 Nest Thermostat? Use Matter via Google Home — free, works well once prerequisites are confirmed.
- Have an older Nest model (any 1st–3rd gen Learning Thermostat or Thermostat E)? Get the Starling Home Hub — it is the only clean solution and also covers your Nest Protect and cameras.
- Have multiple Nest devices beyond just the thermostat? The Starling Home Hub handles everything in one device, making it worthwhile even for compatible thermostat models.
- ✓ Siri voice control for temperature
- ✓ Include thermostat in HomeKit scenes
- ✓ Trigger automations from sensors, time, location
- ✓ Google Home app continues to work
- ✓ Remote access via Apple Home Hub
- ✓ Works with smoke alarm shutoff automations
- ✗ Nest-specific features (Energy History, Nest Leaf) only in Google Home
- ✗ Requires Apple Home Hub for remote access
- ✗ Matter pairing requires Google Matter Controller online
- ✗ Older models require Starling Hub (~$99)
Frequently Asked Questions
Not via Matter — that standard is only supported on the 2020 Nest Thermostat and the 4th-gen Nest Learning Thermostat. For all older models, including the 1st, 2nd, and 3rd-generation Nest Learning Thermostat and the Nest Thermostat E, the Starling Home Hub is the best available bridge solution.
For the 2020 Nest Thermostat, the Google Home app on iOS supports Matter pairing code generation, so an Android device is not required. The 4th-gen Nest Learning Thermostat displays its own QR code on the thermostat screen, eliminating any need for a separate device.
You need an Apple Home Hub — an Apple TV 4K, HomePod, or HomePod mini — to use automations, remote access, and Siri commands when away from home. Without a Home Hub, you can still control the thermostat locally through the Apple Home app when on the same Wi-Fi network, but remote control and automations will not function.
Yes. Matter is specifically designed to allow multi-ecosystem use. After pairing your Nest thermostat with Apple HomeKit via Matter, it continues to function normally in the Google Home app. Changes made in either app are reflected immediately on the physical device.
Compatible Google Matter Controllers include the Nest Hub (2nd gen), Nest Hub Max, Nest Wi-Fi Pro, and Google Home with a compatible hub. A standalone Google Home Mini or older-generation Nest Hub (1st gen) alone may not qualify — check Google’s current compatibility list if you are unsure about your specific device.
No. Nest-specific features like Energy History, the Nest Leaf energy indicator, and Home/Away learning behavior are proprietary to the Google Home and Nest app ecosystem. Apple Home shows the thermostat as a standard HomeKit climate controller — current temperature, target temperature, and mode — but the deeper Nest analytics are only available in the Google Home app.
Open the Apple Home app, long-press the thermostat tile, tap the settings icon, scroll down, and tap Remove Accessory. This removes it from Apple Home without affecting its connection to Google Home. To remove the Matter pairing from Google’s side as well, go to Google Home → thermostat Settings → Linked Matter apps & services and remove the Apple Home connection there.
Conclusion: Which Method to Use and What to Do Next
Adding a Nest thermostat to Apple Home has gone from an unsupported hack to a supported, well-documented process — and for the most recent Nest models, it takes about five minutes and costs nothing. Here is the summary:
- 4th-gen Nest Learning Thermostat: Go to Settings → Matter on the thermostat, display the QR code, scan it in Apple Home. Done.
- 2020 Nest Thermostat: Generate a Matter pairing code in the Google Home app, then use it in Apple Home’s Add Accessory flow. Takes about 10 minutes.
- All older Nest models: Get the Starling Home Hub. It handles the bridge transparently and also covers your Nest Protect alarms and cameras.
Once your thermostat is in Apple Home, take the time to set up at least two automations: a leave-home setback that saves energy when everyone departs, and a smoke alarm integration that cuts the HVAC fan if a fire is detected. Both are configured in the Apple Home app’s Automations tab and take five minutes each to set up.
The result is a Nest thermostat that responds to Siri, participates in your HomeKit scenes, and works alongside every other HomeKit accessory in your home — all while continuing to function normally in Google Home.


