How to Tell If Your Thermostat Is Bad — 12 Symptoms, Tests & Real Fixes
Something is wrong with your heating or cooling, and now you’re wondering whether the thermostat is the culprit — or just a bystander. It’s one of the most frustrating HVAC troubleshooting situations homeowners face, because the symptoms of a bad thermostat look almost identical to the symptoms of a bad furnace, a failed compressor, or a wiring problem. This guide gives you a definitive, step-by-step framework to know exactly when your thermostat is bad — and when it isn’t.
Thermostats fail more quietly than almost any other home system component. They rarely go out in a dramatic blaze of sparks. Instead, they drift — readings get slightly off, schedules start misfiring, the HVAC runs a bit longer than it should. By the time most homeowners notice something is wrong, the thermostat has been declining for months.
The good news: a bad thermostat is one of the cheapest and easiest home HVAC problems to fix. A basic replacement runs $25–$60. Even a full smart thermostat upgrade costs less than a single HVAC service call. The challenge is confirming the diagnosis before you spend money on the wrong fix.
In this guide you’ll find all 12 warning signs of a failing thermostat, two definitive tests you can perform right now without any special tools, a 10-minute diagnostic checklist, and a clear framework for deciding whether your situation calls for a simple repair, a reset, or a full replacement. Let’s start with the symptoms.
The 12 Warning Signs of a Bad Thermostat
Not every thermostat problem is a terminal failure — some are caused by dead batteries, a tripped breaker, or a loose wire. But the symptoms below, especially when they appear in combination, strongly indicate the thermostat itself needs to be replaced. Here’s what to watch for.
HVAC Won’t Turn On or Off
System ignores thermostat commands entirely, staying off when it should heat/cool or running non-stop when it shouldn’t.
Short-Cycling System
HVAC turns on for 2–5 minutes, shuts off, then turns back on again within minutes. Repeats constantly.
Wrong Temperature Reading
The display reads 5°F or more off from a separate thermometer placed at the same location.
Blank or Flickering Display
Screen goes dark intermittently or doesn’t illuminate at all — even with fresh batteries installed.
Unresponsive Controls
Buttons or touchscreen don’t register presses. Settings can’t be changed. Unit appears locked without a lockout being set.
Heating & Cooling Running Together
Both heat and cool activate at the same time, or the system keeps switching modes without user input.
Schedules Not Executing
Programmed wake/sleep/away temperatures don’t activate as scheduled. System stays on the manual override permanently.
System Runs Constantly
Heating or cooling never shuts off, even after the set temperature has been reached and the room is clearly at the target.
Unexplained Spike in Energy Bills
Energy bills jump 20–40% with no change in weather or usage — a stuck-on thermostat running the HVAC unnecessarily.
Click But No HVAC Response
You hear the thermostat relay click but the HVAC doesn’t start — or vice versa, no click when the system should activate.
Persistent Error Codes
Error codes like E1, E2, or “Sensor Fail” persist after a reset and after the root cause has been addressed.
Thermostat Feels Warm to the Touch
Housing is noticeably hot, indicating an internal short circuit or a failing component drawing excess current.
Sign #1: Your HVAC System Won’t Turn On — or Won’t Turn Off
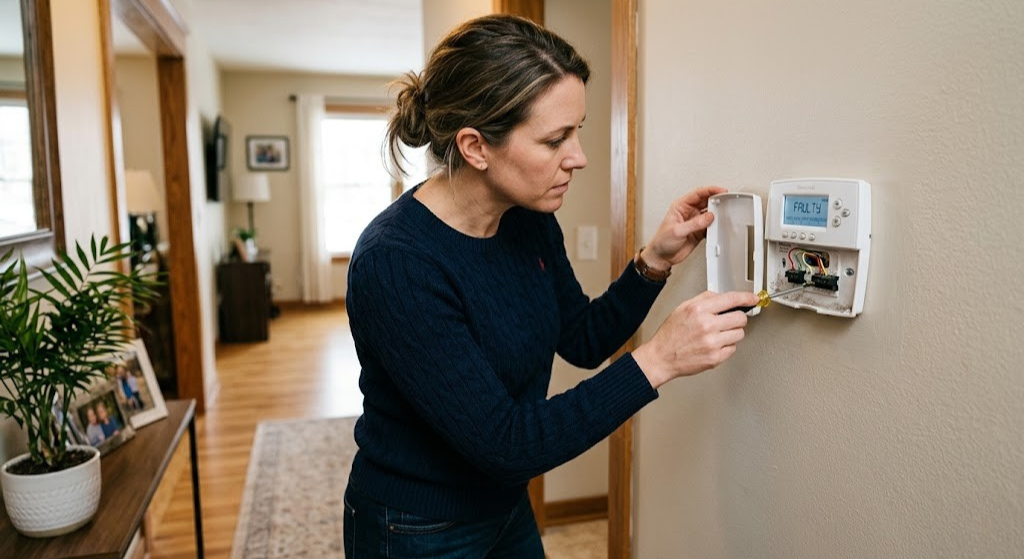
This is the most dramatic and disruptive symptom. On a cold winter night, you push the heat up and nothing happens. Or the air conditioner runs through a cool evening without ever cycling off. Both scenarios are exhausting, potentially damaging to your HVAC equipment, and often misattributed to the furnace or AC unit when the thermostat is actually the culprit.
The thermostat controls your HVAC through low-voltage (24V) signal wires. When you ask for heat, the thermostat closes a circuit between the R wire (power) and the W wire (heat call), sending 24V to the furnace control board, which then activates the burner sequence. If the thermostat’s internal relay that closes this circuit has failed — either stuck open (won’t call for heat) or stuck closed (won’t stop calling) — the result is exactly what you’d see above.
Quick confirmation: Set the temperature 5–6°F above or below the current room temperature and wait 3 minutes. If your HVAC system absolutely refuses to respond despite your thermostat clearly being powered and the correct mode selected, the problem is either a failed relay in the thermostat, a wiring break between the thermostat and air handler, or a fault on the HVAC system’s control board. The bypass test (covered later) will isolate which one.
Sign #2: Short-Cycling — HVAC Turns On and Off Rapidly
A healthy HVAC system runs in long, efficient cycles — typically 10–20 minutes of heating or cooling, then off. Short-cycling — where the system runs for only 2–5 minutes before shutting off, then fires up again within minutes — is both inefficient and mechanically hard on your compressor and heat exchanger.
When a thermostat is the cause, it’s usually because of a failing temperature sensor (thermistor) inside the unit. The sensor reads the room as having reached the set temperature far too quickly — sometimes within minutes of the system starting — causing the thermostat to send a “satisfied” signal and cut the HVAC. The room then quickly returns to the original temperature and the cycle repeats.
Short-cycling can also be caused by an oversized HVAC system, a refrigerant leak in the AC, or a dirty air filter. But if filter and refrigerant have been ruled out, and the system is the right size for your home, a thermostat with a drifting sensor is the prime suspect. See our diagnostic flow on thermostats not reaching set temperature for a systematic approach.
Sign #3: Wrong Temperature Reading
Place a calibrated digital thermometer next to your thermostat for 15 minutes. If the readings differ by more than 2–3°F, your thermostat is likely misreading the room. This causes your HVAC to cycle on and off at the wrong times, meaning the room never reaches the comfort level you actually want.
Wrong temperature readings have several potential causes — some related to the thermostat’s internal components, some related to its physical location:
- Failing thermistor (most likely hardware cause): The internal temperature sensor has drifted out of calibration or has a developing open circuit.
- Thermostat location issues: Mounted on an exterior wall, near a supply register, in direct sunlight, or above a lamp — all artificially inflate or deflate the reading.
- Chimney effect from wall cavity: Warm air rising from inside the wall behind the thermostat creates a “ghost heat” that makes the thermostat read higher than room air temperature.
- Low battery voltage: Dying batteries in some models affect ADC (analog-to-digital converter) accuracy, causing sensor misreadings.
Test first: Replace batteries with a fresh pair before concluding the thermistor has failed. Low-battery voltage is by far the most common and most overlooked cause of thermostat reading errors. Understanding how to properly read your thermostat also helps you interpret the displayed values correctly.
Sign #4: Blank or Flickering Display
A dark or intermittently flickering thermostat display can mean one of three things: the thermostat has lost power, the display hardware is failing, or the unit is in a deep sleep/fault mode. Diagnosing which one requires a quick power check before assuming the worst.
If the display goes dark after a battery swap, the new batteries may be installed incorrectly (reversed polarity), or the batteries themselves are dead-on-arrival. If the display flickers intermittently, it’s often a sign of intermittent battery contact — clean the battery terminals with a pencil eraser, as corrosion causes high-resistance connections that cause the display to dim under load. A screen that simply goes blank permanently and doesn’t respond to battery swaps or breaker cycles is usually a hardware failure — the display driver chip or the main circuit board has failed.

Energizer MAX AA Alkaline Batteries — 20 Pack
Before spending a dollar on diagnostics, swap the batteries. Dead or weak batteries cause more thermostat “failures” than actual hardware defects. Use premium alkaline batteries and replace them annually — not just when the low-battery indicator appears.
🛒 View on AmazonSign #5: Buttons or Touchscreen Won’t Respond
An unresponsive thermostat that ignores button presses or touch inputs is deeply frustrating. The first thing to rule out is an active keypad lock — many programmable thermostats have a lockout feature, and it’s very easy to enable accidentally. Check your thermostat’s manual for the unlock procedure (typically holding two buttons for 5 seconds).
If the thermostat is definitively not locked and still doesn’t respond, the issue is hardware: either the membrane layer beneath the buttons has delaminated and lost contact, or (for touchscreen models) the capacitive digitizer has failed. Neither is economically repairable — replacement is the right call. Our article on programmable thermostats with keypad lock features explains lockout modes in detail if you suspect that’s what happened.
Sign #6: Heat and Cool Running Simultaneously
This is one of the most jarring thermostat failure modes. You’re paying to heat and cool your home at the same time, the HVAC is working overtime, your energy bill is spiking, and nothing is comfortable. The fault almost always lies in the thermostat’s internal logic or relay configuration.
Most conventional thermostats use separate relays for the heating call (R→W) and cooling call (R→Y). If both relays close simultaneously — which can happen when the thermostat’s control board fails — both signals are sent to the HVAC simultaneously. For heat pumps, this symptom can also occur when the O/B terminal (reversing valve) is configured incorrectly after a reset.
Sign #7: Programmed Schedules Stop Working
Your thermostat was faithfully following its wake/leave/return/sleep schedule for years, and then one day you notice the house is too warm when you get home, or too cold when you wake up. The programmed schedule seems to have stopped executing.
Before blaming the hardware, check whether the thermostat’s clock has drifted or reset — many battery-powered models lose their time setting when batteries are replaced and revert to 12:00 AM, throwing all schedules off by hours. Also check whether the thermostat has been switched to manual “Hold” mode, which overrides the schedule indefinitely. If the clock is correct and no hold is active, the thermostat’s non-volatile memory (where schedules are stored) may have corrupted — a factory reset can sometimes restore functionality, but if it recurs, the memory chip is failing.
Sign #8: System Runs Constantly Without Shutting Off
A thermostat that never sends a “satisfied” signal will let your HVAC run around the clock. This typically happens when the thermostat’s internal temperature sensor reads the room as perpetually below the setpoint — either because the sensor is reading low (room seems cold to the thermostat even when it isn’t) or because the relay that should open to cut the call for heat/cool is physically stuck closed.
A system running constantly isn’t just expensive — it’s damaging. Furnace heat exchangers crack under excessive duty cycles. AC compressors wear out faster. If you notice your system never cycling off, investigate immediately. Related: our guide to why your thermostat keeps turning on the AC covers this exact scenario with a full decision tree.
Sign #9: Unexplained Spike in Your Energy Bill
A faulty thermostat doesn’t always announce itself with dramatic symptoms. Sometimes the only signal is a puzzling 25–40% jump in your electricity or gas bill. If your usage habits haven’t changed, the weather isn’t dramatically different from prior years, and your HVAC equipment is well-maintained, a misbehaving thermostat that is running the system when it shouldn’t is a prime suspect.
Compare your current bill month-over-month with the same month in prior years using your utility company’s usage history tool. If the deviation is 20%+ without an obvious explanation, pull your HVAC runtime data from the app (if you have a smart thermostat) or install a simple hour-meter on your air handler to measure actual runtime. If it’s running double the expected hours, the thermostat is misbehaving.
Sign #10: Thermostat Clicks But HVAC Doesn’t Respond
This symptom is actually a helpful diagnostic clue. A click from your thermostat means the relay is working — the thermostat’s hardware is successfully opening and closing the control circuit. The fault therefore lies downstream of the thermostat: the wiring between the thermostat and air handler, the control board fuse in the air handler, or the HVAC equipment itself.
Common downstream causes when the thermostat clicks but nothing happens:
- Blown 3-amp or 5-amp fuse on the air handler/furnace control board
- Tripped secondary condensate overflow switch (AC systems)
- Loose or corroded wire at the air handler terminal block
- Failed furnace igniter or gas valve
- Compressor capacitor failure (AC won’t start)
For a complete walkthrough of this exact scenario, our article on thermostat clicks but HVAC won’t start covers every step of the downstream diagnostic.
Sign #11: Persistent Error Codes
Error codes like E1, E2, 88, or “Sensor Failure” are the thermostat’s way of telling you something specific is wrong internally. A single error code that clears after a reset and never returns is usually a transient glitch. But an error code that returns within hours or days of clearing — especially E1 (indoor sensor fault) or E2 (outdoor sensor fault on heat pump thermostats) — indicates the sensor that’s being monitored has genuinely failed and needs replacement.
Don’t ignore error codes: Operating a thermostat with a persistent sensor error means it’s guessing at the room temperature rather than measuring it. Your HVAC will cycle incorrectly, comfort will suffer, and energy bills will climb. Replacement is the right call once the code keeps coming back.
Sign #12: Thermostat Housing Feels Warm to the Touch
A thermostat housing should feel roughly room-temperature. If it’s noticeably warmer than the surrounding wall — especially in a localized area near one corner — it may indicate an internal short circuit drawing excess current. This is less common with modern thermostats, which have robust overcurrent protection, but it does occur in older units and in cases where incorrect wiring has been in place for a long time.
A warm thermostat that also has a burning smell is a safety concern. Turn off power at the breaker and do not attempt to re-energize it until the wiring has been inspected by a licensed electrician or HVAC technician.
Thermostat Problem vs. HVAC System Problem — How to Tell Them Apart
This is where most homeowners get stuck. The symptoms of a bad thermostat and the symptoms of a bad furnace, AC, or air handler are often identical: the system won’t start, won’t stop, or doesn’t heat/cool properly. Here’s the definitive framework for separating them.
🔀 Quick Isolation Decision Tree
No → Power issue (batteries, breaker, C-wire, or blown fuse). Fix power first.
Yes → Thermostat relay works. Suspect downstream wiring, fuse, or HVAC board. No → Thermostat relay may be stuck open. Proceed to bypass test.
HVAC starts with bypass → Thermostat is confirmed bad. HVAC still won’t start → Fault is in HVAC system, not thermostat.
More than 3°F off → Sensor failure or location issue. Check with a separate thermometer at the same height on the same wall.
Side-by-Side Comparison: Thermostat vs. HVAC Fault Patterns
| Symptom | Points to Thermostat | Points to HVAC System | Could Be Either |
|---|---|---|---|
| No heat, thermostat calling for it | If relay doesn’t click | If relay clicks but no HVAC response | — |
| No cool, thermostat calling for it | Bypass test: HVAC starts | Bypass test: HVAC still won’t start | — |
| Short-cycling | Inaccurate temp reading | Dirty filter, oversized system | Both |
| System runs non-stop | Stuck relay or bad sensor | Refrigerant leak, extreme cold | Both |
| Wrong temperature reading | Failed thermistor | — | Location issue |
| Blank display | Battery/display failure | Blown control board fuse | Both |
| High energy bill | Stuck relay running HVAC | Low refrigerant, dirty coils | Both |
The Wire Bypass Test — The Most Definitive Thermostat Test
The wire bypass test is the single most reliable way to confirm whether your thermostat is bad. It takes under 5 minutes, requires no tools, and gives you a definitive yes/no answer. This is the test HVAC technicians perform first when called out for “no heat” or “no cool” complaints.
Safety first: The thermostat wire system operates at 24V AC — low voltage and generally safe to handle briefly. However, touching the wires together for more than 5–10 seconds can send a sustained signal that may trip a high-pressure limit switch or cause unnecessary compressor cycling. Keep contact brief and do not attempt this on a 110V or 240V line-voltage thermostat system (used on electric baseboard heaters).
How to Perform the Wire Bypass Test
Remove the thermostat from its wall plate
Pull the thermostat straight off the wall — most models snap off without tools. The wiring terminals and the wires connected to them will now be visible on the wall plate. Do NOT disconnect any wires yet.
Identify the R wire and the signal wire for what you’re testing
The R wire (usually red) is the 24V power wire from the transformer. For heat: find the W wire (white). For cooling: find the Y wire (yellow). For fan: find the G wire (green). These wires will be inserted into labeled terminals on the wall plate.
Pull R and W (or Y) out of their terminals slightly
Use a small flathead screwdriver to loosen the terminal screws just enough to give the wire ends about ½ inch of slack. You need to be able to touch the bare wire ends together without disconnecting them completely from the terminal block.
Briefly touch the R wire to the W wire (for heat) or Y wire (for cool)
Hold the two bare wire ends together for 3–5 seconds. This manually closes the circuit that your thermostat’s relay is supposed to close. Watch and listen for your furnace or AC to activate. You may hear the air handler fan start, the furnace burner ignite, or the outdoor AC compressor kick on.
Interpret the result
HVAC responds when wires are touched together? → The circuit works. The thermostat is confirmed faulty because it couldn’t close this circuit on its own. Time to replace the thermostat.
HVAC still doesn’t respond? → The fault is in the HVAC system, control board, or wiring — not the thermostat. Call an HVAC technician.
Separate the wires and reinstall the thermostat
Once you have your answer, separate the wires, reseat them firmly in their terminals, and snap the thermostat back onto the wall plate. If you’ve confirmed the thermostat is bad, you can leave it disconnected and order a replacement.
Video: Step-by-step wire bypass test to diagnose a bad thermostat vs. a faulty HVAC system. (Source: YouTube — HVAC School)
If you have a heat pump, also check the O/B wire (orange or blue) — this controls the reversing valve. Touching R to O/B switches the heat pump between heating and cooling mode. A heat pump that heats when it should cool (or vice versa) often has the O/B terminal setting configured incorrectly in the thermostat, not a hardware failure.
Multimeter Voltage Test — For Precise Electrical Diagnosis
If you have a multimeter (or are willing to borrow one — they run about $15 on Amazon), you can get precise electrical readings that leave no ambiguity about what’s working and what isn’t. This test takes about 10 minutes and tells you definitively whether the 24V power supply, the thermostat’s output signals, and the control wiring are all healthy.
Set your multimeter to AC Voltage (VAC), with the range at 50V or higher. Thermostat systems operate at 24V AC — do not use the DC voltage setting.
Voltage Tests at the Thermostat Terminals
| Test | Red Probe | Black Probe | Expected Reading | Meaning if Wrong |
|---|---|---|---|---|
| Transformer check | R terminal | C terminal | 24–28V AC | 0V = blown fuse or dead transformer |
| Heat signal check | W terminal | C terminal | 24V AC when calling for heat | 0V = thermostat not sending heat call |
| Cool signal check | Y terminal | C terminal | 24V AC when calling for cool | 0V = thermostat not sending cool call |
| Fan signal check | G terminal | C terminal | 24V AC when fan is on | 0V = thermostat not sending fan call |
| Wiring continuity | W at thermostat | W at air handler | 0V difference (same wire) | Any voltage = broken wire or bad connection |
Interpreting Multimeter Results
R-to-C reads 0V: No 24V power is reaching the thermostat. Check the breaker, the air handler fuse, and the transformer. The thermostat cannot function without power — this is a power supply issue, not a thermostat failure.
R-to-C reads 24V but R-to-W reads 0V when calling for heat: Power is present, but the thermostat isn’t passing it through to the W wire when it should. The internal relay or control board has failed. The thermostat is bad.
R-to-C reads 24V and R-to-W reads 24V when calling for heat, but furnace still won’t start: The thermostat is working perfectly. The fault is in the furnace control board, the wire run to the furnace, or the furnace itself.
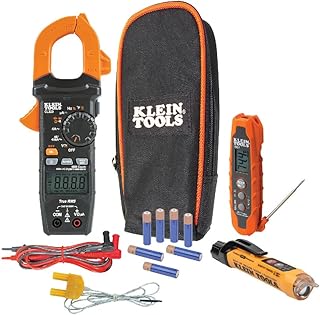
AstroAI Digital Multimeter — Essential HVAC Diagnostic Tool
A basic digital multimeter is the single most useful tool for diagnosing thermostat and HVAC electrical problems. This model handles AC/DC voltage, resistance, and continuity — everything you need for thermostat testing.
🛒 View on AmazonThe 10-Minute Diagnostic Checklist
Before concluding your thermostat is bad, work through this checklist in order. Many apparent thermostat failures are actually simple fixable issues — and this checklist will either resolve the problem in minutes or confirm that replacement is necessary.
🔧 Thermostat Diagnostic Checklist — Check Each Item
Completed all 10 steps and the bypass test confirmed a bad thermostat? Great — now you have a confirmed diagnosis. Read on for guidance on choosing the right replacement.
Root Causes of Thermostat Failure — What Actually Goes Wrong Inside
Understanding why thermostats fail helps you assess whether a replacement is truly necessary, and whether there are any underlying conditions in your home that could damage a new thermostat prematurely.
1. Failed Internal Relay
The relay is the heart of the thermostat — a small electromagnetic switch that opens and closes the control circuit to call for heating, cooling, or fan. Relays have a rated cycle count (often 100,000 or more), but they can fail prematurely due to excessive switching (short-cycling), voltage spikes, or simply age. A failed relay either stays permanently open (won’t call for heat/cool) or permanently closed (runs continuously). This is the most common hardware failure mode in thermostats over 10 years old.
2. Degraded Thermistor (Temperature Sensor)
The thermistor is a resistor whose resistance changes with temperature, allowing the thermostat to measure room temperature. Over time, thermistors drift — their resistance characteristics change slightly, causing systematic reading errors. A thermistor that reads consistently 4–6°F high or low will cause your HVAC to cycle at the wrong times, degrading both comfort and efficiency. Thermistor drift is more common in older analog thermostats but does occur in digital units after a decade of use.
3. Corroded Terminals and Wiring
The terminal block where thermostat wires connect is one of the most vulnerable points in the entire HVAC control system. Copper wire oxidizes over time, forming a resistive layer that reduces signal voltage. In humid climates, this corrosion accelerates dramatically. Symptoms include intermittent operation, HVAC that responds sometimes but not others, and readings that drift throughout the day as temperature changes affect the resistance of the corroded joint. Cleaning terminals with a wire brush or replacing corroded wire ends often restores full function without replacing the thermostat.
4. Low or Weak Battery Voltage
This is the most frequently misdiagnosed “thermostat failure” in the industry. Alkaline AA batteries nominally deliver 1.5V each, but as they discharge they settle to 1.2–1.3V. Most thermostat circuits are calibrated to work down to about 2.4V total (two batteries), but the analog-to-digital converter that reads the thermistor is sensitive to supply voltage variations. Below ~2.4V total, temperature readings become erratic, relays may not fully close, and the display dims. All of this mimics hardware failure. Swapping batteries is always the first test.
5. Age and Component Degradation
Electronic components degrade over time even without specific failure events. Capacitors dry out and lose their capacitance. Solder joints develop micro-cracks from years of thermal cycling (the thermostat expands and contracts slightly with each HVAC cycle). Membrane button layers delaminate. Most thermostats reach the end of reliable service life somewhere between 10 and 15 years. If your thermostat is in this range and showing any of the symptoms in Section 1, age-related degradation is a reasonable explanation and replacement is prudent.
6. Voltage Spikes and Lightning
A nearby lightning strike or a significant voltage spike from the power grid can fry thermostat circuit boards instantly. If your thermostat stopped working immediately following a severe thunderstorm — especially if other electronics in your home were also affected — a surge-related failure is likely. Protect your new thermostat installation with a whole-home surge protector at the main panel.
| Failure Cause | How Common | DIY Fixable? | Typical Fix | Cost |
|---|---|---|---|---|
| Dead batteries | Very common | Yes | Replace batteries | $3–$8 |
| Corroded terminals | Common | Yes | Clean or re-terminate wires | $0–$5 |
| Blown control board fuse | Moderate | Yes | Replace 3A fuse | $1–$3 |
| Failed relay | Moderate | No (replace thermostat) | New thermostat | $25–$200 |
| Drifted thermistor | Moderate (older units) | No (replace thermostat) | New thermostat | $25–$200 |
| Age-related board degradation | Common (10+ yr units) | No (replace thermostat) | New thermostat | $25–$200 |
| Voltage spike / lightning | Rare | No (replace thermostat) | New thermostat + surge protection | $25–$300 |

Honeywell Home T6 Pro — Top-Rated Replacement Thermostat
If your diagnostic confirms a bad thermostat, the T6 Pro is one of the most reliable direct replacements available. Compatible with most 24V heating and cooling systems, easy DIY installation, and 7-day flexible programming.
🛒 View on AmazonRepair vs. Replace: Making the Right Decision
Once you’ve confirmed a thermostat is bad, the question becomes: is there anything to repair, or is replacement automatic? The honest answer for most homeowners is that thermostat “repair” is almost never the right move — and here’s why.
Why Thermostat Repair Rarely Makes Sense
Thermostats are sealed, integrated circuit assemblies. Unlike a car engine or a furnace burner, there are no user-serviceable components. A failed relay is soldered onto the circuit board. A drifted thermistor is embedded in the board assembly. Replacing these components requires micro-soldering skills, specialty components, and diagnostic equipment that costs far more than the thermostat itself.
The economics are stark: a competent electronic repair shop might charge $75–$150 in labor to diagnose and repair a thermostat — for a part that costs $30–$80 new. A new thermostat also comes with a warranty, fresh components, and often upgraded features (programmability, Wi-Fi, smart home integration). The repair route simply doesn’t compute financially.
✅ When Replacement Makes Sense
- Confirmed relay, sensor, or board failure
- Thermostat is 10+ years old
- Symptoms keep recurring after resets
- Water, pest, or physical damage
- Want to add smart/Wi-Fi features
- Preparing to sell your home
- Cracked display or housing
⚠️ Check These Before Replacing
- Batteries haven’t been replaced yet
- Keypad lockout hasn’t been checked
- Wiring and terminals not inspected
- Air handler fuse not checked
- Bypass test not yet performed
- Thermostat is under 3 years old (may be under warranty)
Thermostat Warranty — Check Before You Buy New
Many thermostats carry manufacturer warranties of 1–5 years. Honeywell Home, Ecobee, Nest, and Sensi all offer warranties — check your purchase receipt or the manufacturer’s website with your model number. If your thermostat is under warranty and you’ve confirmed it’s defective through the bypass test, contact the manufacturer for a free or discounted replacement before purchasing a new one out of pocket.
For smart thermostats specifically, some failures are firmware-related and can be resolved with an over-the-air update or a factory reset — meaning a $0 fix rather than a $150 replacement. Always try a factory reset on a smart thermostat before concluding it’s dead hardware.
Choosing the Right Replacement Thermostat
A thermostat replacement is also an opportunity to upgrade. Modern thermostats offer dramatically better scheduling, energy savings, and comfort features compared to units from even 5–7 years ago. Here’s how to navigate the options.
Compatibility First
Before anything else, identify your HVAC system type and check compatibility with any thermostat you’re considering. The key questions:
- Do you have a heat pump? Heat pumps require a thermostat that supports O/B terminal wiring (the reversing valve).
- How many stages? Single-stage, 2-stage, or variable speed — each requires a thermostat designed for that number of stages.
- Do you have a C-wire? Smart thermostats strongly prefer a C-wire for stable Wi-Fi operation. Check for one before purchasing a smart model.
- Zoned system? Zoned HVAC with a zone controller board may have special thermostat requirements.
Thermostat Category Comparison
| Category | Price Range | Best For | Top Examples | Energy Savings |
|---|---|---|---|---|
| Basic Programmable | $25–$60 | Simple schedules, no app needed | Honeywell T6 Pro, Emerson 1F86ST | Moderate |
| Wi-Fi Programmable | $60–$120 | Remote access, basic smart home | Honeywell RTH9585, Sensi Touch | Moderate–Good |
| Smart / Learning | $120–$200 | Automation, geofencing, learning | Nest 4th Gen, Ecobee Premium, Honeywell T9 | Excellent |
| Smart with Sensors | $150–$250 | Multi-room comfort, zoning | Ecobee Premium, Honeywell T10 Pro | Excellent |
| Budget Smart | $35–$80 | App control on a tight budget | Amazon Smart Thermostat, Wyze Thermostat | Good |
If you’re considering a smart thermostat upgrade, our comparison of Nest vs. Honeywell for multi-stage HVAC systems is a great starting point, as is our deep dive into key features to compare when buying a smart thermostat.
DIY Installation vs. Professional Install
Replacing a thermostat is one of the most accessible DIY home projects — typically requiring just a screwdriver, 20 minutes of work, and the ability to match colored wires to labeled terminals. The only scenario where professional installation is genuinely recommended is a heat pump system with complex wiring, a multi-zone system with a zone controller board, or any situation where the existing wiring doesn’t match the new thermostat’s requirements.

Ecobee Premium Smart Thermostat — Our Top Smart Upgrade Pick
If you’re replacing a bad thermostat and want to upgrade at the same time, the Ecobee Premium is the most feature-complete smart thermostat available. Built-in air quality monitoring, SmartSensor support, Alexa built-in, and ENERGY STAR certified savings.
🛒 View on AmazonThermostat Maintenance — Preventing Future Failures
A thermostat that’s well-maintained can easily last 15 years or more. These simple habits significantly extend service life and help you catch developing problems before they become full failures.
Annual Maintenance Routine
Replace batteries every 12 months (no exceptions)
Do it at the same time as your furnace filter change each fall — it’s easy to bundle the habits. Use brand-name alkaline batteries; avoid rechargeables. Mark the replacement date on a piece of tape inside the battery cover.
Clean the interior once per year
Remove the thermostat from its wall plate and use a can of compressed air to blow out any dust from around the circuit board and sensor. Dust insulates the thermistor and causes reading errors. Do not touch the circuit board or use vacuum cleaners.
Inspect and clean terminal connections
Annually check the thermostat wire terminals for green or white corrosion. Clean with a small wire brush or pencil eraser. Tighten any loose screws. Corroded terminals are the #2 cause of thermostat malfunction after dead batteries.
Verify accuracy with an external thermometer
Once per season, place a calibrated digital thermometer next to your thermostat for 15 minutes and compare readings. A difference greater than 3°F signals a developing sensor problem before it becomes a comfort issue.
Keep firmware updated (smart thermostats)
Firmware updates from Honeywell Home, Nest, Ecobee, and others frequently fix bugs that cause erratic behavior. Enable automatic updates in the app or check for updates each fall before heating season begins.
Location Matters More Than You Think
If your thermostat is consistently reading incorrectly despite fresh batteries and clean terminals, the culprit may be its physical location rather than its hardware. The optimal thermostat location is an interior wall, at eye level (about 5 feet off the floor), away from supply registers, exterior walls, windows, doors, and any appliances that generate heat. If your current thermostat is poorly located and causing persistent problems, relocating it is a cost-effective long-term fix — our guide on moving a thermostat with wire extension and splicing covers this project in detail.
📚 Official Resources & Further Reading

Falcon Dust-Off Electronics Compressed Air Duster
Annual interior cleaning of your thermostat prevents sensor inaccuracies and extends hardware life. Compressed air is the safest cleaning method — it removes dust without risking static discharge or mechanical damage.
🛒 View on AmazonFrequently Asked Questions
Conclusion: Know for Sure Before You Spend a Dime
Here’s the takeaway from everything above: don’t replace your thermostat based on symptoms alone, and don’t call an expensive HVAC technician before performing the two tests that give you a definitive answer in under 10 minutes.
Start with the quick checklist — batteries, breaker, keypad lock, wiring, and fuse. If the problem persists, perform the wire bypass test. If the HVAC responds to wires bridged directly but not to the thermostat, you have your confirmed diagnosis and a $25–$200 fix. If the HVAC still doesn’t respond with wires bridged, the thermostat is innocent — focus diagnostic energy on the furnace, AC, or air handler instead.
The 12 warning signs in this guide are pattern-matching tools, not verdicts. Many of them share symptoms with HVAC faults, location problems, or simple maintenance issues. The bypass test and the multimeter test are your verdicts. Use them.
And if your thermostat does turn out to be bad — a replacement is not just a repair, it’s an opportunity. Modern programmable and smart thermostats offer scheduling precision, energy monitoring, geofencing, and remote control that older units couldn’t dream of. The investment often pays for itself within a single heating and cooling season through improved efficiency alone.
Ready to Diagnose or Replace?
Use our resources below to take the next step — whether that’s a deeper diagnostic, a smart thermostat comparison, or understanding your energy savings potential.
🔍 Full Diagnostic Checklist → 📋 Smart Thermostat Buyer’s Guide →


