Table of Contents
- The HVAC Fan Explained
- “Auto” vs. “On” Debate
- Energy Cost Calculator
- Hidden Benefits & Drawbacks
- PSC vs. ECM Motor Deep Dive
- Seasonal Fan Settings Guide
- Smart Thermostat Fan Control
- The “Circulate” Mode Advantage
- Air Quality Deep Dive
- Complete Humidity Guide
- Fan Troubleshooting Guide
- Multi-Zone HVAC Systems
- Thermostat Compatibility
- DIY Upgrade Guide
- ROI & Payback Calculator
- Vacation & Away Settings
- Geofencing & Automation
- Sleep Temperature Science
- Smart Upgrades
- FAQ
- Conclusion
Thermostat Fan: Auto vs. On – A Homeowner’s Complete Guide to Saving Energy & Money
Have you ever glanced at your thermostat, seen the fan setting switch, and wondered if it really matters? You’re not alone. That tiny switch, with its simple “Auto” and “On” options, holds a surprising amount of power over your home’s comfort, air quality, and most importantly, your monthly energy bill.
Many homeowners set it once and forget it, not realizing the significant financial and environmental impact of their choice. Leaving your HVAC fan running constantly can be like leaving a 500-watt light bulb on 24/7, silently adding hundreds of dollars to your yearly expenses. This comprehensive guide will demystify your thermostat’s fan settings, break down the real costs, and empower you to make the smartest choice for your home and your wallet.
The Unsung Hero of Your Home: Understanding the HVAC Fan
Before we dive into the “Auto vs. On” debate, let’s appreciate what your thermostat fan—more accurately called the blower or air handler—actually does. It’s the heart of your home’s circulatory system for air.
When your furnace generates heat or your air conditioner produces cool air, that conditioned air doesn’t magically float into every room. The blower is a powerful fan, typically located inside your furnace or a dedicated air handler unit, that forces this air through your home’s ductwork and out of the vents. Without it, the heating and cooling would be trapped in one place, rendering your HVAC system useless.
Understanding the full scope of what your blower motor does also means understanding what a split HVAC system is and how its components communicate. In a split system, the indoor air handler and the outdoor condenser work together, and the blower serves as the critical bridge that moves conditioned air from one to the other and out into your living space. The thermostat’s fan setting is ultimately the command center for this entire process.
Key Takeaway: The thermostat fan setting doesn’t control a small fan in the thermostat itself. It controls the main blower for your entire HVAC system, which is responsible for circulating all the heated or cooled air throughout your house. To understand more about inverter technology in modern HVAC systems, check out our in-depth guide—variable-speed blower motors work hand-in-hand with inverter compressors to maximize efficiency.
The Anatomy of Your HVAC Blower System
Your HVAC blower system is more complex than it might appear. It consists of several key components working in harmony:
- The Blower Motor: The electric motor that drives the fan wheel. This is the most energy-intensive component and comes in two main types — PSC and ECM (more on those below).
- The Squirrel Cage Fan Wheel: The rotating wheel with curved blades designed to move large volumes of air efficiently. Unlike axial fans (like a ceiling fan), centrifugal blowers like these are ideal for pushing air through the resistance of ductwork.
- The Blower Control Board: The electronic brain that receives signals from your thermostat and translates them into specific motor speeds and timing.
- The Air Filter Housing: Positioned at the intake of the blower, this is where your air filter lives, capturing particles before they enter the system.
- The Plenum and Ductwork: The network of metal channels through which the blower pushes conditioned air to every room in your home.
When you understand that your thermostat is essentially the nerve center of this entire system, you begin to appreciate the importance of thermostat compatibility with your furnace. A mismatched thermostat can send incorrect signals to your blower motor, leading to inefficiency, comfort problems, and even premature equipment failure. If you’re unsure whether your thermostat and furnace are communicating correctly, it’s worth running a compatibility check before assuming a fan-setting change will fix everything.
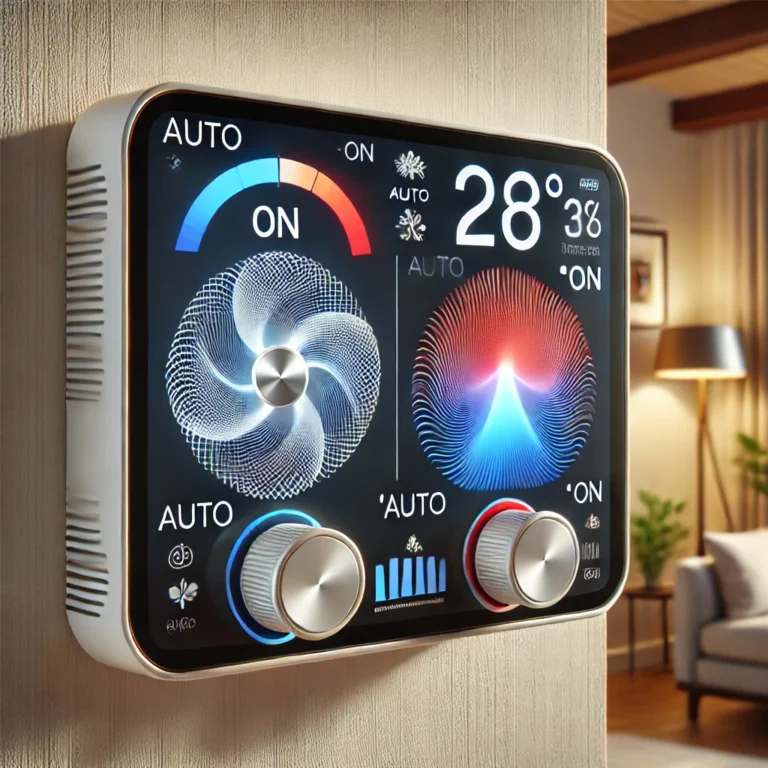
The Big Debate: Fan “Auto” vs. “On” Mode Explained
This is the core of the issue. While both settings result in air circulation, they operate on fundamentally different principles.
What is “Auto” Mode?
In “Auto” mode, the blower fan operates in sync with your heating or cooling cycles. When the thermostat calls for heat or AC, the system and the fan turn on together. Once the desired temperature is reached, both the heating/cooling unit and the fan shut off. The fan will only run again when the next cycle begins. This is the default and most common setting for a reason.
What is “On” Mode?
In “On” mode, the blower fan runs continuously, 24 hours a day, 7 days a week, regardless of whether your furnace or air conditioner is active. It is constantly circulating air through your home, even when the temperature is stable. Think of it as putting the air circulation on a manual override that never stops.
| Feature | “Auto” Mode | “On” Mode |
|---|---|---|
| Energy Consumption | ✓ Significantly Lower | ✗ Much Higher (2-3x) |
| Air Circulation | ✗ Intermittent | ✓ Continuous |
| Air Filtration | ✗ Only during cycles | ✓ Continuous filtration |
| Temperature Evenness | ✗ Can lead to hot/cold spots | ✓ More consistent temperature |
| Blower Motor Wear | ✓ Less wear and tear | ✗ Increased wear and tear |
| Filter Lifespan | ✓ Lasts longer | ✗ Clogs up faster |
| Humidity Control (Summer) | ✓ Better dehumidification | ✗ Re-evaporates moisture |
| Noise Level | ✓ Quieter overall | ✗ Constant background noise |
| Best For | Energy savings and general use. | Allergy sufferers and homes with poor circulation. |
The Million-Dollar Question: How Much Power Does a Thermostat Fan Use?
The energy consumption of an HVAC blower isn’t trivial. The exact wattage depends heavily on the type, size, and age of your system. Here’s a general breakdown:
- Standard PSC Motors: Permanent Split Capacitor (PSC) motors are the older, less efficient standard. They often run at a single speed and can consume between 500 to 800 watts.
- High-Efficiency ECMs: Electrically Commutated Motors (ECMs) are the modern, energy-efficient standard. These are variable-speed motors that use significantly less power, often only 200 to 300 watts, and can ramp their speed up or down as needed. According to the U.S. Department of Energy, an ECM can use up to 50% less electricity than a PSC motor.
For a detailed technical breakdown of exactly how these two motor technologies compare in real-world scenarios, see our comprehensive guide on HVAC blower wattage: PSC vs. ECM costs. That article goes even deeper into real-world wattage measurements under different static pressure conditions, helping you calculate your true running costs down to the cent.
Let’s Calculate the Real-World Cost
To understand the financial impact, let’s run the numbers. We’ll use a standard 500-watt PSC motor and the U.S. average electricity rate of approximately $0.17 per kilowatt-hour (kWh).
DIY Cost Calculator
You can estimate your own costs using this simple formula:
Scenario 1: “Auto” Mode (Runs ~8 hours/day on average)
- Daily Cost: (500W / 1000) * 8 hours * $0.17/kWh = $0.68 per day
- Monthly Cost: $0.68 * 30 days = $20.40 per month
- Yearly Cost: $20.40 * 12 months = $244.80 per year
Scenario 2: “On” Mode (Runs 24 hours/day)
- Daily Cost: (500W / 1000) * 24 hours * $0.17/kWh = $2.04 per day
- Monthly Cost: $2.04 * 30 days = $61.20 per month
- Yearly Cost: $61.20 * 12 months = $734.40 per year
The Shocking Difference: By simply switching from “On” to “Auto,” a homeowner in this scenario could save approximately $41 per month or a staggering $489 per year! That’s enough to pay for a new smart thermostat several times over. For a personalized ROI calculation that factors in your specific equipment and local utility rates, use our Wi-Fi thermostat ROI payback calculator.
Beyond Cost: Hidden Benefits and Drawbacks of Each Setting
Money isn’t the only factor. Your choice impacts your home’s environment in several ways.
Air Quality & Allergies
Advantage: “On” Mode. If you or a family member suffers from allergies, asthma, or general sensitivity to dust, the “On” setting can be a game-changer. By constantly circulating air, it continuously pulls particles like dust, pollen, and pet dander through your HVAC filter. This can lead to noticeably cleaner air. However, this comes at the cost of changing your air filters much more frequently—perhaps every month instead of every three months.
Home Comfort & Even Temperatures
Advantage: “On” Mode. Do you have that one room that’s always hotter or colder than the rest of the house? This is often due to poor air stratification. Since heat rises, upper floors can become stuffy while basements remain chilly. Running the fan on “On” constantly mixes the air, helping to balance the temperature throughout your home and eliminating those annoying hot and cold spots.
Humidity Control (A Surprising Twist!)
Advantage: “Auto” Mode (in Summer). This is a crucial, often overlooked detail. During a cooling cycle, moisture from your home’s air condenses on the cold indoor evaporator coil and drips away. When the AC cycle ends and the fan stays on (“On” mode), it can re-evaporate some of that collected moisture and blow it right back into your home, making it feel more humid. In “Auto” mode, the fan shuts off, allowing the moisture to drain properly.
PSC vs. ECM Motors: A Deep Dive That Changes Everything
Understanding the difference between PSC (Permanent Split Capacitor) and ECM (Electronically Commutated Motor) blower motors is perhaps the single most important technical distinction for homeowners wrestling with the fan setting dilemma. The motor type in your system fundamentally changes how costly “On” mode really is — and whether it’s even worth the debate.
PSC Motors: The Old Guard
PSC motors have been the workhorse of residential HVAC systems for decades. They’re simple, inexpensive to manufacture, and relatively reliable. However, they have a critical flaw: they operate at full speed at all times. There is no variable speed — the motor is either off or running at 100%. This means that every minute it runs, it draws its full rated wattage, typically 400–800W.
For homeowners with a PSC motor, the “On” setting is particularly punishing from an energy standpoint. Running a 600W PSC motor 24/7 costs roughly $89/month in electricity at average U.S. rates. That’s over $1,000 per year just for air circulation. If this sounds alarming, it should be. Before you continue reading, check your system’s air handler or furnace manual to see which motor type you have. The distinction will dramatically change your cost calculations. Our deep-dive article on HVAC blower wattage for PSC vs. ECM provides specific wattage figures by motor model so you can calculate your exact costs.
ECM Motors: The Modern Standard
ECM motors represent a generational leap in efficiency. Using brushless DC technology with sophisticated electronic controls, these motors can operate at a wide range of speeds — from a quiet, low-power circulation speed all the way up to maximum airflow for peak heating or cooling demand. Key advantages include:
- Variable speed operation: An ECM can circulate air at 20–30% of full speed, using only 50–100W instead of 400–600W.
- Soft-start and soft-stop: ECMs ramp up and down gradually, eliminating the jarring blasts of air common with PSC systems.
- Constant airflow technology: Advanced ECMs can adjust their speed in real time to maintain a consistent CFM (cubic feet per minute) even as your filter gets dirtier. This prevents the efficiency loss common in PSC systems with clogged filters.
- Quieter operation: Because they often run at lower speeds for circulation, ECMs are significantly quieter, which can make leaving the fan on “On” much more tolerable.
If your system has an ECM, the calculus for fan settings changes significantly. Running an ECM in continuous low-speed circulation mode may only cost $8–$15/month — a much more reasonable price for the air quality and comfort benefits it provides. This is why many modern smart thermostats are designed to leverage ECM capabilities for features like “Circulate” mode, which we’ll cover in detail later.
Important Note: Even if you have an ECM motor, running it on “On” at full speed still costs significantly more than “Auto” mode. The key is using your thermostat’s “Circulate” feature, which lets ECMs run at their most efficient low-speed setting for air mixing, rather than the high-speed “On” mode that most homeowners think of.
The Complete Seasonal Guide to Fan Settings
One of the most overlooked aspects of thermostat fan management is that the optimal setting genuinely changes with the seasons. A one-size-fits-all approach leaves comfort and savings on the table. Here’s exactly what to do and why, for each season.
☀️ Summer
Dehumidification is critical. Run on Auto to let condensate drain properly after each AC cycle. The “On” setting can raise indoor humidity by 2–5% by re-evaporating moisture from the evaporator coil.
Recommended: AUTO❄️ Winter
Heat stratification is the enemy. Warm air pools at the ceiling. Using Circulate or brief On periods helps mix the layers, making your home feel warmer at lower thermostat settings.
Recommended: CIRCULATE🌱 Spring
Pollen season peak. If allergy sufferers are in the home, running on Circulate keeps air moving through filters while minimizing the full cost of “On” mode.
Recommended: CIRCULATE🍂 Fall
Mild outdoor temps mean fewer HVAC cycles. Auto is ideal, but if you notice the house feeling stuffy, a brief period on On can refresh the air without significant cost.
Recommended: AUTOWinter Heating: Why Fan Settings Affect Your Heating Bill More Than You Think
In winter, the relationship between your fan setting and your heating bill is nuanced. Research consistently shows that homes maintain comfortable indoor temperatures around 68°F most efficiently when air stratification is actively managed. In a typical home with 9-foot ceilings, the temperature difference between floor level and ceiling can be as much as 10°F. That warm air pooling at the ceiling is being wasted — your furnace is working to heat air that never reaches the people in the room.
Using a brief “Circulate” cycle during winter can actually lower your overall heating bill by ensuring the heat is where you need it — at occupant level — rather than lost at the ceiling. Some homeowners find they can comfortably set their thermostat 1–2°F lower when using circulate mode, which represents a 3–6% reduction in heating energy use. For an average home spending $1,200/year on heating, that’s $36–$72 in annual savings from the smart fan management alone.
Smart Thermostat Fan Control: A Quantum Leap Over Manual Thermostats
The single biggest upgrade you can make to optimize your fan settings — without ever touching the fan switch manually — is installing a smart thermostat. Modern smart thermostats don’t just offer three static fan modes; they offer sophisticated, dynamic fan management that adapts to your home’s needs in real time.
How Smart Thermostats Manage Your Fan Differently
A basic programmable thermostat treats the fan setting as a binary on/off decision. You choose “Auto” or “On” and that’s it. Smart thermostats, by contrast, can:
- Vary fan speed based on whether heating or cooling is running
- Run the fan on a schedule for timed circulation (the “Circulate” feature)
- Detect occupancy and adjust fan operation accordingly
- Monitor air quality sensors and run the fan when VOC or CO2 levels rise
- Learn your home’s thermal characteristics and pre-condition air before you arrive home
- Coordinate fan operation with geofencing to stop running when everyone leaves
Understanding the difference between smart AI-learning and basic schedule-based programmable thermostats is essential before purchasing. A learning thermostat like the Nest will automatically build a schedule that optimizes fan runtime based on your actual habits, while a basic programmable thermostat requires you to manually input every schedule change. For fan management, the AI-learning advantage is particularly pronounced in shoulder seasons (spring and fall) when heating and cooling patterns are irregular.
Nest vs. Ecobee: Fan Control Head-to-Head
The two dominant smart thermostat platforms handle fan control very differently, and understanding these differences can help you choose the right upgrade. The Nest vs. Honeywell comparison for multi-stage HVAC systems reveals important nuances in how each platform manages blower speed on multi-stage equipment.
Nest thermostats use an AI learning algorithm called “True Radiant” that anticipates when your home needs to be conditioned and starts the fan slightly early to pre-distribute air. It also features a “Fan Schedule” setting that allows you to run the fan for a set number of minutes per hour, just like “Circulate” mode on ecobee. However, Nest’s fan scheduling is buried in the app settings, while ecobee makes it front-and-center on the device.
The ecobee’s advantage lies in its SmartSensor ecosystem and its transparent “Circulate” mode. When you set ecobee to circulate, you can specify exactly how many minutes per hour the fan runs — from 5 to 55 minutes. More importantly, ecobee uses its room sensors to make intelligent decisions about when to activate circulation based on which rooms are occupied and what temperatures they’re reading. For homes with significant room-to-room temperature variation, this sensor-driven approach to fan management is significantly more effective than any manual setting. Learn more about how Nest’s Auto Schedule compares to ecobee’s SmartSensors in our detailed head-to-head comparison.
The “Circulate” Mode: Why It’s the Best Fan Setting Nobody Talks About
If “Auto” and “On” were the only options for thermostat fan control, the advice would be straightforward: use Auto in summer and On sparingly in winter. But there’s a third option that represents the genuine sweet spot between comfort and efficiency: Circulate mode.
Available on most modern smart thermostats — and critically underused by most homeowners — Circulate mode runs the fan for a programmable number of minutes each hour, regardless of whether heating or cooling is active. This creates gentle, consistent air mixing throughout the day without the enormous energy cost of continuous “On” operation.
The Math on Circulate Mode
Let’s compare the three fan modes for a home with a standard 500W PSC blower motor running 15 minutes of circulation per hour in Circulate mode:
| Fan Mode | Daily Runtime | Daily Cost (at $0.17/kWh) | Annual Cost |
|---|---|---|---|
| Auto (8 hrs/day) | 8 hours | $0.68 | $248 |
| Circulate (15 min/hr) | 6 hours + 8 heating/cooling = 14 hrs | $1.19 | $434 |
| On (24 hrs/day) | 24 hours | $2.04 | $745 |
Circulate mode at 15 min/hr costs roughly 58% of “On” mode while delivering most of the air quality and temperature-balancing benefits. If you have an ECM motor, the numbers are even more favorable — some ECM systems running at low-speed circulation draw only 100W, making Circulate mode cost less than $100/year total even with generous run times.
Setting Up Circulate Mode on Popular Thermostats
Setting up Circulate mode varies by thermostat brand. Here’s a quick overview of the process for the most popular brands:
- Ecobee: Go to Main Menu → Settings → Installation Settings → Equipment → Air Handler → Fan Control → Enable Fan Circulation and set the desired minutes per hour (5–55 min)
- Nest: Open the Nest app → Settings → Fan → Schedule → Set desired runtime
- Honeywell T9/T10: Go to Menu → Fan → Circulation Settings → Set percentage of time per hour
- Amazon Smart Thermostat: Via the Alexa app → Devices → Thermostat → Fan → Schedule
Air Quality Deep Dive: Fan Settings and Your Family’s Health
The relationship between your HVAC fan setting and indoor air quality is far more complex than simply “more fan = cleaner air.” Understanding the nuances can help you make a genuinely informed decision based on your family’s specific health needs.
The Science of Indoor Air Pollution
The EPA consistently ranks indoor air quality as one of the top environmental health risks, noting that indoor air can be 2–5 times more polluted than outdoor air in some cases. Your home constantly generates airborne contaminants including:
- Particulate Matter (PM2.5 and PM10): Dust, pet dander, skin cells, textile fibers, and particles tracked in from outside
- Biological Contaminants: Mold spores, bacteria, and viruses that travel on aerosol droplets
- Volatile Organic Compounds (VOCs): Off-gassing from furniture, carpets, cleaning products, and building materials
- Carbon Dioxide (CO2): Exhaled by occupants, CO2 buildup causes drowsiness and reduced cognitive function
- Radon: A naturally occurring radioactive gas that can accumulate in basements
Your HVAC filter — when the fan is running — actively captures particulate matter. MERV-rated filters (Minimum Efficiency Reporting Value) range from MERV 1 (basic fiberglass that catches almost nothing microscopic) to MERV 16 (hospital-grade filtration). For most residential applications, a MERV 11–13 filter strikes the best balance between filtration efficiency and airflow restriction.
When VOC and CO2 Levels Should Override Your Fan Setting
Premium smart thermostats like the ecobee Premium now include built-in sensors for VOC concentration and CO2 levels. The ecobee Premium’s air quality monitoring features can automatically trigger fan operation when air quality drops below acceptable thresholds, effectively giving you the best of both worlds: Auto mode efficiency when air quality is good, and increased ventilation when it’s not.
If your thermostat doesn’t have built-in air quality monitoring, you can achieve similar functionality by pairing a standalone air quality monitor with smart home automation. When the monitor detects elevated VOC or CO2 levels, it can trigger your thermostat to switch to “On” mode temporarily, then revert to “Auto” when levels normalize.
MERV Ratings and Fan Runtime: Finding the Right Balance
There’s an important tradeoff between filter quality and fan efficiency that most homeowners don’t consider. Higher MERV filters catch more particles but also restrict airflow more significantly. This means:
- A MERV 8 filter allows your blower to move air easily, drawing its rated wattage
- A MERV 13 filter creates more resistance, causing PSC motors to work harder and draw more power
- A MERV 16 filter can reduce airflow so significantly that it actually reduces the fan’s effectiveness, potentially causing the evaporator coil to freeze in summer
ECM motors handle this tradeoff much better than PSC motors. Because ECMs automatically compensate for increased static pressure by adjusting their speed, they maintain consistent airflow even with high-MERV filters — they just draw slightly more power to overcome the resistance.
The Complete Humidity Management Guide for HVAC Fans
We touched on humidity in the hidden benefits section, but this topic deserves a deep dive because it’s one of the most misunderstood aspects of fan settings — and it has direct implications for your family’s comfort, health, and your home’s structural integrity.
The Dehumidification Process: What Really Happens
When your air conditioner runs, the indoor evaporator coil chills to temperatures well below the dew point. As warm, humid indoor air passes over this cold coil, water vapor condenses on its surface — exactly like a cold glass sweating on a hot day. This condensate collects in a drip pan and drains away through a condensate line.
Here’s where the fan setting matters critically: the evaporator coil doesn’t stop being cold the instant the AC compressor turns off. It retains its chilled temperature for several minutes afterward. If your fan is in “On” mode, it continues to blow warm house air across this cold coil — causing more condensation — but there’s now a twist. With the compressor off, the coil starts warming up. As it warms, the moisture that has already condensed on it begins to re-evaporate and gets carried back into your home by the running fan.
The practical result: homes using “On” fan mode in summer often run 2–5% higher relative humidity than identical homes using “Auto” mode. In humid climates like the Southeast or Pacific Northwest, this difference can push indoor humidity from the comfortable 45–55% range into the uncomfortable and potentially problematic 60%+ range where mold growth becomes a risk.
The Winter Humidity Paradox
In winter, the calculation flips. Cold outdoor air is dry, and heating it further reduces relative humidity. Many homes struggle with excessively dry indoor air in winter (below 30% RH), which causes static electricity, dry skin, cracked wood furniture, and increased susceptibility to viruses. In this case, continuous fan operation in winter actually helps by more evenly distributing whatever humidity exists in your home — preventing the extreme dryness that occurs when the warm, dry air from your furnace pools near the ceiling without mixing.
For homes that struggle with winter dryness, pairing the right fan strategy with a whole-house humidifier is the optimal solution. Our guide on the best whole-house humidifiers for 2026 covers the top products that integrate directly with your HVAC system for automatic humidity control.
HVAC Fan Troubleshooting: When Something Goes Wrong
Even if you’ve set your fan to the optimal mode for your situation, things can go wrong. Fan problems are some of the most common HVAC issues homeowners face, and understanding how to diagnose them can save you hundreds on service calls.
Common Fan Problems and Their Causes
🔧 Quick Diagnostic Checklist
Before calling an HVAC technician, work through these diagnostic steps. You can often identify the root cause yourself in under 10 minutes. Our full 10-minute thermostat diagnostic checklist walks you through a systematic process for identifying whether the problem is in your thermostat, wiring, or HVAC equipment.
- Check that the thermostat display is active and not showing low battery warnings
- Verify the fan switch hasn’t accidentally been moved to “Off”
- Check the circuit breaker for both the air handler and the outdoor unit
- Inspect the air filter — a severely clogged filter can trigger safety shutoffs
- Look for error codes or blinking indicator lights on your furnace control board
- Test by manually setting the fan to “On” — if it runs but doesn’t run in “Auto,” the issue is likely a signal problem between thermostat and equipment
The Fan Runs But There’s No Heating or Cooling
This is one of the most frustrating HVAC scenarios. The fan clearly works — you can feel air blowing — but it’s not conditioned. This symptom points to a disconnect between the blower and the heating/cooling equipment. Common causes include:
- Tripped breaker on the outdoor unit: The air handler may share a circuit with the blower, while the condenser or furnace burner has its own circuit that tripped.
- Flame sensor failure in furnace: The furnace may be attempting to light but failing the flame verification sequence, causing it to lock out. The blower runs but doesn’t know the burner isn’t lit.
- Refrigerant leak: Low refrigerant causes the AC system to lose cooling capacity. The fan runs but moves unconditioned air.
- Failed capacitor: If the outdoor condenser fan or compressor capacitor fails, you may get indoor airflow without actual cooling.
Our detailed guide on what to do when the furnace won’t turn on but the fan works provides a step-by-step diagnostic process for this exact scenario, including how to safely check whether the issue is electrical, mechanical, or related to your thermostat signal.
The Fan Won’t Run At All
When the fan refuses to run in any mode, the issue is typically one of three things: a failed blower motor, a failed capacitor, or a thermostat that isn’t sending the correct signal. Before replacing any expensive components, it’s worth verifying that the problem is actually in your equipment and not in your thermostat. Our guide on why a thermostat doesn’t start the furnace covers the wiring and signal checks that can identify a thermostat fault quickly.
Low battery voltage in a thermostat is a surprisingly common cause of fan operation failures. When thermostat batteries drop below a certain voltage threshold, the device may lose the ability to close relay contacts with enough current to activate the blower motor — even though the display still lights up. If you’re experiencing intermittent fan problems, replacing the batteries is always step one. Read more about thermostat low battery, fading display, and relay click failure symptoms to know if this is your culprit.
The Fan Runs But the House Won’t Reach the Set Temperature
If your fan is running normally but the thermostat just can’t seem to hit its setpoint, the issue may not be your fan at all — but the fan setting can still contribute to the problem. Here’s how:
- In “On” mode during summer, the re-evaporation of moisture from the evaporator coil can make the air feel warmer than it actually is (higher humidity = higher apparent temperature), causing the thermostat’s temperature sensor to read correctly but occupants to feel too warm.
- A dirty filter restricts airflow, reducing the system’s ability to exchange heat efficiently. The fan runs, but not enough air is moving to transfer the needed BTUs.
- If the thermostat itself is poorly placed — in direct sunlight, near a heat source, or in a room with poor air circulation — it may be reading the wrong temperature entirely. Our guide on why your thermostat shows the wrong room temperature addresses placement issues and sensor calibration in detail.
For a comprehensive diagnostic workflow covering all the reasons a thermostat might not reach its set temperature, see our thermostat not reaching set temperature diagnostic flowchart.
Multi-Zone HVAC Systems: Fan Settings Get More Complex
In a single-zone home, the fan setting decision is relatively straightforward. But an increasing number of homes — particularly larger properties and those built or renovated in the last 15 years — have multi-zone HVAC systems. In these setups, motorized dampers in the ductwork allow different areas of the home to be heated or cooled independently, with multiple thermostats controlling the zones.
Multi-zone systems change the fan setting equation significantly. When only one zone is calling for conditioning, the blower must still move the full air volume — but now it’s being directed through only part of the duct system. This increases static pressure significantly, which can cause problems with PSC motors (they work harder and draw more power) and can also cause “high-limit” safety shutoffs if the pressure becomes too extreme.
Zone Bypass Dampers and Fan Performance
Most properly installed multi-zone systems include a barometric bypass damper — a pressure-relief valve in the ductwork that opens when static pressure gets too high, allowing excess air to recirculate rather than build up dangerous pressure. If your multi-zone system doesn’t have one, or if it’s undersized, running the fan in “On” mode in a multi-zone scenario can cause premature equipment failure.
If you’re considering upgrading to smart thermostats in a multi-zone system, the wiring complexity increases substantially. Our guide on replacing Honeywell HZ311 zone thermostats with ecobee units provides detailed wiring diagrams and tips for making this transition successfully. The key insight: in multi-zone setups, fan control signals must be coordinated at the zone controller level, not just at each individual thermostat.
Remote Sensors and Fan Control in Multi-Zone Homes
The strongest argument for smart thermostats in multi-zone homes is their remote sensor capability. When ecobee SmartSensors or Nest temperature sensors are placed in problem rooms, the system can intelligently activate fan circulation specifically to address those rooms’ temperature imbalances — rather than running the fan continuously in a brute-force attempt to equalize temperatures throughout the home. This targeted approach reduces unnecessary fan runtime while solving the actual comfort problem.
For a detailed comparison of how different smart thermostat systems handle multi-zone remote sensor scenarios, see our head-to-head comparison of ecobee vs. Honeywell for remote sensor range in multi-zone applications.
Thermostat Compatibility and Fan Control Wiring
Not all thermostats can control all fan modes equally well, and the wiring that connects your thermostat to your HVAC equipment is the physical medium through which fan control signals travel. Understanding a few key wiring concepts can prevent frustration and potentially save you from buying a thermostat that won’t fully integrate with your system.
The Critical Role of the C-Wire
The C-wire (Common wire) is a 24V power return wire that provides continuous power to smart thermostats. Without it, many smart thermostats resort to “power stealing” — borrowing small amounts of current from the heating, cooling, or fan wiring whenever those systems are active. This power-stealing approach works for basic thermostat operation, but it can cause intermittent issues with fan control, particularly with the “Circulate” feature that needs to activate the fan independently of heating or cooling.
If you’re experiencing issues where your smart thermostat’s fan scheduling doesn’t work reliably, a missing or improperly wired C-wire is often the culprit. Our detailed comparison of Nest vs. Sensi power-stealing vs. battery backup approaches explains how different brands handle this challenge and which approach is most reliable for continuous fan control features.
The “G” Wire: Your Fan’s Direct Line
In standard HVAC wiring, the “G” wire is the dedicated fan control wire. When your thermostat closes the G circuit, it tells your air handler to run the fan. In “Auto” mode, the furnace or AC control board handles fan activation internally. In “On” mode or “Circulate” mode, the thermostat actively sends a signal through the G wire to keep the fan running independently of the heating/cooling call.
If your “On” mode doesn’t seem to work — or if the fan only runs when heating or cooling is active — suspect an issue with the G wire connection. This is a simple fix: check that the wire is securely seated in the G terminal at both the thermostat and the air handler. Our thermostat wiring guide provides visual diagrams for checking and correcting these connections: complete thermostat wiring guide with diagrams.
When You Need to Extend or Move Thermostat Wiring
Sometimes the best fix for temperature imbalance and fan distribution problems isn’t changing a fan setting — it’s moving the thermostat itself to a better location where it can more accurately represent the whole home’s temperature. If your thermostat is poorly located (near a window, above a vent, in an entry hallway), it may be calling for heating or cooling based on conditions that don’t reflect the rest of the house, leading to over-cycling or under-conditioning.
Moving a thermostat requires extending or rerouting its control wiring. Our guide on how to move a thermostat wire using extension and splicing techniques walks through this process safely, including how to avoid common mistakes that can damage the low-voltage control system.
DIY Smart Thermostat Installation: Unlocking Better Fan Control
If you’re still using a manual or basic programmable thermostat, you’re leaving significant fan control sophistication on the table. Installing a smart thermostat is one of the most accessible DIY home improvement projects available, with most installations taking 30–60 minutes and requiring only a screwdriver.
Before You Buy: The Compatibility Check
The most important step before purchasing any smart thermostat is verifying compatibility with your existing system. Key factors to check:
- Count Your Wires: Remove your existing thermostat cover and count the wires connected to terminals. If you have a C-wire (usually blue), most smart thermostats will install easily. Without a C-wire, you may need an adapter kit or a thermostat that supports power stealing reliably.
- Identify Your System Type: Is it a heat pump, conventional furnace + AC, boiler, or radiant heat? Heat pump systems require thermostats with an “O/B” reversing valve terminal. Many smart thermostats support heat pumps, but not all.
- Check for Multi-Stage Equipment: Two-stage furnaces and two-stage AC compressors have additional wiring (W2, Y2) that requires a thermostat with multi-stage support.
- Verify Voltage: Most home HVAC systems use 24VAC low-voltage control wiring. Line-voltage systems (commonly used for baseboard heaters) require different thermostats entirely.
- Check Wi-Fi Band: Most smart thermostats work on 2.4GHz Wi-Fi. If your router only broadcasts 5GHz, you’ll need to enable the 2.4GHz band or choose a thermostat with Thread/Z-Wave connectivity.
For a comprehensive compatibility check process, use our guide: how to tell if your thermostat can be upgraded. It covers all the edge cases and system types in detail.
Installation Walkthrough: The Amazon Smart Thermostat
The Amazon Smart Thermostat is arguably the easiest entry point into smart thermostat territory for homeowners who want better fan control without a complex installation. Our full Amazon Smart Thermostat review covering C-wire adapter installation provides photos and step-by-step guidance through every stage of the installation process, including how to use the included C-wire adapter if you don’t have a C-wire in your existing wiring.
The Ecobee Installation Advantage: Power Extender Kit (PEK)
Ecobee offers a unique solution for homes without a C-wire called the Power Extender Kit (PEK). Unlike power-stealing approaches that can cause intermittent issues, the PEK is wired at the furnace control board and converts the existing wiring to provide continuous power to the ecobee. Our detailed guide on Sensi vs. ecobee C-wire and PEK installation compares these two approaches side-by-side so you can choose the right solution for your home’s wiring configuration.
Return on Investment: Does a Smart Thermostat Pay for Itself?
Every homeowner considering a smart thermostat upgrade ultimately wants to know: will it pay for itself, and if so, how quickly? The answer depends heavily on your current thermostat, your energy rates, and how much you’re currently overspending on fan operation.
The ROI Equation for Fan Setting Optimization
Let’s build a real ROI model for a homeowner currently running an older manual thermostat with the fan set to “On” 24/7 (a surprisingly common scenario, especially in multi-story homes where the owner set it to “On” to reduce temperature stratification and never switched it back).
| Scenario | Annual Fan Cost | Annual Savings vs. “Always On” |
|---|---|---|
| Old thermostat, PSC motor, fan “On” 24/7 | $734 | Baseline |
| New thermostat, PSC motor, fan “Auto” | $245 | +$489/year |
| New thermostat, PSC motor, “Circulate” 15min/hr | $434 | +$300/year |
| New thermostat, ECM motor, “Circulate” 15min/hr | $87 | +$647/year |
For the homeowner upgrading from an old PSC system to a modern ECM air handler plus smart thermostat, the combined annual savings from optimized fan operation alone can approach $650/year — meaning the equipment pays for itself in 2–3 years even before accounting for the heating and cooling efficiency improvements of the new equipment.
For a more personalized calculation, our interactive Wi-Fi thermostat ROI payback calculator allows you to input your actual electricity rate, current fan runtime, and motor wattage to generate precise savings projections. The calculator also factors in utility rebate programs, which can further accelerate the payback period — and speaking of rebates, our 2026 smart thermostat rebates guide lists every current utility and manufacturer rebate available, many of which can reduce the purchase price of qualifying thermostats by $50–$150.
Vacation and Away Settings: Optimizing Fan Settings When Nobody’s Home
When you leave for vacation or an extended period away from home, the fan setting decision takes on a different character. The objective shifts from comfort optimization to a balance between energy savings, pipe protection, and maintaining safe indoor conditions.
The Risk of Setting the Fan to “Off” While Away in Winter
Some homeowners turn off their HVAC systems entirely while on vacation in winter to maximize savings. This is a risky strategy. If outdoor temperatures drop significantly, the lack of heat circulation can allow pipes in exterior walls or uninsulated spaces to freeze. The fan, even in “Auto” mode at a setback temperature, plays a role in distributing the minimal heat the system is producing to ensure it reaches vulnerable pipe locations.
The safest vacation thermostat strategy for winter is to set the thermostat to a minimum safe temperature (typically 55–60°F) and leave the fan in “Auto” mode. This allows the system to cycle on when temperatures drop, with the fan distributing that heat to protect pipes throughout the house. Our comprehensive guide on winter vacation thermostat settings to prevent pipe freeze covers this topic in depth, including the specific temperature recommendations for different climate zones and home construction types.
Away Mode and Smart Thermostat Fan Behavior
Smart thermostats handle away mode very differently from manual setback. When an ecobee or Nest detects via geofencing or schedule that the home is unoccupied, it enters an “Away” or “Eco” mode that reduces both heating/cooling cycles and fan operation. The fan typically only runs when the HVAC system is actively conditioning the space in Away mode — effectively forcing “Auto” even if the normal at-home setting is “Circulate” or “On.”
Understanding what the thermostat Home/Away feature actually does to your fan and HVAC settings is important before relying on it for extended absences. Some thermostats have configurable minimum temperature safeguards for Away mode; others rely on the user to set these manually. Making sure your Away temperature setpoints are configured correctly before leaving for vacation is a critical step that many homeowners overlook.
Geofencing and the Smart Fan: How Location Awareness Changes Everything
Geofencing — using your smartphone’s GPS location to trigger thermostat actions — represents the next evolution beyond simple schedules for fan management. The concept is straightforward: when your phone (and by extension, you) leaves the house, the thermostat automatically reduces HVAC activity and fan operation. When you approach home, it automatically resumes comfort settings so the house is at your preferred temperature when you arrive.
How Geofencing Optimizes Fan Runtime
The impact of geofencing on fan runtime and energy costs can be substantial. Traditional schedule-based thermostats waste energy by running heating, cooling, and fan circulation during predictable away periods — but they can’t adapt to irregular schedules. Geofencing solves this by tying system operation directly to actual occupancy rather than predicted occupancy.
Studies of homes using geofencing-enabled thermostats show average HVAC runtime reductions of 20–30% compared to schedule-only thermostats, with fan-specific savings even higher since fan circulation in “Circulate” mode typically stops entirely in Away/Eco mode. Our analysis of smart thermostat geofencing and HVAC runtime provides detailed data on actual runtime reductions across different home sizes and climate zones.
Setting Up Geofencing Effectively
Geofencing works best when configured with appropriate radius settings and household member participation. Key configuration tips:
- Set your radius thoughtfully: A radius that’s too small triggers the system too late, and you arrive home to an uncomfortable house. Too large, and you’re pre-conditioning for a long time before you arrive. A 2–5 mile radius typically provides the right balance for most commute patterns.
- Include all household members: Geofencing works based on the last person leaving and first person arriving. All adult household members should have the thermostat app installed with location permissions enabled.
- Consider battery impact: GPS geofencing can impact smartphone battery life. Some thermostats offer Wi-Fi-based presence detection as a battery-friendly alternative for detecting when phones are connected to the home network.
For a detailed guide to setting up geofencing on specific thermostat brands, our article on smart thermostat geofencing to cut HVAC runtime costs provides brand-specific setup instructions and troubleshooting tips.
Sleep Temperature Science: Fan Settings for Better Rest
The relationship between temperature, fan operation, and sleep quality is backed by a growing body of research — and the findings have practical implications for how you should configure your thermostat’s fan settings during nighttime hours.
The Optimal Sleep Temperature Range
Sleep researchers have identified an optimal bedroom temperature range of 65–68°F (18.3–20°C) for most adults. At this range, the body’s natural thermoregulation during sleep — which involves a drop in core body temperature — proceeds most efficiently, leading to deeper, more restorative sleep. The science behind setting your thermostat to 65°F for sleep is compelling: subjects in studies at this temperature showed measurably higher percentages of slow-wave (deep) sleep compared to those in warmer rooms.
How Fan Noise Affects Sleep: The White Noise Effect
Many people actually find the consistent hum of an HVAC fan running in “On” mode to be sleep-conducive — a form of white noise that masks disruptive sounds from outside or other parts of the house. If you find you sleep better with the fan on, the good news is that the energy cost of running your fan during the 7–8 hours you sleep is relatively modest — only about 1/3 of the daily “On” mode cost we calculated earlier. A reasonable compromise is setting your thermostat schedule to switch the fan to “On” during sleep hours and “Auto” during waking hours.
Nighttime Fan Settings on Smart Thermostats
Most smart thermostats allow you to create custom schedules with different fan settings for different time periods. Here’s a recommended nighttime fan management schedule for most homes:
- Bedtime (10PM–11PM): Switch to “On” or “Circulate” at high frequency to quickly equalize bedroom temperatures before sleep
- Deep sleep (11PM–5AM): Switch to “Auto” to minimize noise and energy use during the quietest sleep phases
- Wake-up period (5AM–7AM): Return to “Circulate” to warm/cool the home before you get up
Smart Upgrades to Optimize Comfort and Efficiency
You can get the best of both worlds by investing in modern technology. Here are some products that can make a huge difference.

Amazon Smart Thermostat
An incredibly affordable entry into smart home climate control. It works with Alexa to learn your habits and can automatically adjust for savings. It requires a C-wire for power.
Check Price on Amazon
ecobee Smart Thermostat Premium
The gold standard. It comes with a remote room sensor to help eliminate hot/cold spots and has advanced fan control settings, including a “Circulate” mode that runs the fan for a set number of minutes each hour.
Check Price on Amazon
Filtrete MPR 1900 Air Filters
A high-quality air filter is crucial. This Filtrete model captures fine particles like smoke, cough/sneeze debris, bacteria, and viruses without overly restricting airflow, which keeps your fan running efficiently.
Check Price on AmazonWhen Fan Problems Signal a Bigger HVAC Issue
Sometimes, frustration with fan settings is actually a symptom of underlying HVAC problems that no amount of setting changes will fix. Knowing when to look beyond the fan switch and consider a system upgrade or replacement can save you from years of inefficiency and discomfort.
Signs Your Blower Motor Needs Replacement
- The fan runs slowly in all modes: A capacitor failure can cause the motor to spin at reduced speed, resulting in insufficient airflow even when set to “On”
- The fan makes grinding, squealing, or rattling noises: Bearing failure in the blower motor produces distinctive sounds that worsen over time
- The fan runs but trips the breaker: A motor with failing windings may draw excessive current, repeatedly tripping the circuit breaker
- The fan takes a long time to start: A failing start capacitor can cause the motor to hesitate before reaching operating speed
- Your energy bills are rising without explanation: A motor with degraded efficiency draws more power to move the same volume of air
Blower motor replacement costs typically range from $400–$900 for parts and labor, depending on motor type and system size. If your PSC motor is failing, consider the cost differential of upgrading to an ECM replacement motor — typically $300–$600 more expensive but potentially saving $400–$600/year in operating costs, with a payback period of under two years in many cases.
The Complete HVAC Replacement Question
If your HVAC system is more than 15 years old and experiencing significant fan or blower problems, the math may favor complete system replacement over continued repairs. A modern heat pump or high-efficiency gas furnace paired with a variable-speed ECM blower will outperform an old system in every metric: efficiency, comfort, fan noise, and longevity. Our comprehensive guide to HVAC system replacement costs for 2026 breaks down current pricing for every system type and size, helping you make an informed replacement decision.
Advanced Diagnostics: When Standard Fixes Don’t Work
If you’ve tried adjusting fan settings, replaced your thermostat, and still aren’t seeing the results you expect, it’s time to dig deeper. Some fan and HVAC problems have non-obvious causes that require systematic investigation.
Voltage Drop and Transformer Problems
Low-voltage HVAC control systems operate on 24VAC provided by a small transformer in the air handler. If this transformer is undersized or aging, it may struggle to provide adequate voltage to power both the thermostat and control relays simultaneously. Symptoms include thermostats that reboot when the AC turns on, or fan relays that click but don’t fully close.
Our technical guide on thermostat rebooting when AC turns on due to voltage drop and transformer load explains how to diagnose and resolve this specific issue. It’s a surprisingly common cause of intermittent fan and thermostat problems that is often misdiagnosed as a thermostat fault.
Thermostat Adaptive Learning and Fan Control
If you’ve recently installed a smart thermostat and the fan behavior seems inconsistent or unexpected, you may be experiencing the thermostat’s adaptive learning algorithm making adjustments as it learns your home. Most AI-learning thermostats go through a 7–14 day learning period during which they may vary fan operation from what you expect as they build a model of your home’s thermal characteristics.
Understanding what thermostat adaptive learning actually does behind the scenes — including how it affects fan scheduling — helps you know whether unexpected behavior is intentional optimization or a genuine problem requiring intervention.
Thermistors: The Hidden Sensors That Control Fan Operation
Many homeowners don’t realize that their HVAC system contains multiple thermistors — small temperature-sensing resistors that the control board uses to make decisions about fan operation, heat exchanger protection, and cooling efficiency. If one of these thermistors fails or gives erratic readings, it can cause the fan to operate unexpectedly — running when it shouldn’t, or refusing to run when it should.
Our technical explainer on how thermistors work in smart thermostats and temperature sensing covers both the thermostats themselves and the thermistors embedded in your HVAC equipment, helping you understand the complete temperature-sensing ecosystem that governs fan behavior.
Frequently Asked Questions (FAQ)
Is it better to leave the fan on “Auto” or “On”?
For over 90% of homeowners, “Auto” is the better setting. It provides the best balance of comfort and energy efficiency, saving you a significant amount of money on electricity and reducing wear on your HVAC system.
Can running the fan on “On” damage my HVAC system?
It won’t cause immediate damage, but it will accelerate wear and tear on the blower motor and its components simply due to constant use. This could lead to earlier-than-expected repairs or replacement. If you notice odd behavior, like your thermostat clicking but not turning on, it’s a sign that professional inspection is needed. Our detailed guide on thermostat clicks but HVAC won’t start covers battery, breaker, and wiring causes for this specific symptom.
What is the “Circulate” setting on some thermostats?
“Circulate” is a hybrid option found on many smart thermostats. It’s an excellent compromise. Instead of running 24/7, it runs the fan for a predetermined period (e.g., 10-15 minutes) every hour to mix the air, providing better temperature balance and filtration without the massive energy cost of the full “On” mode.
How often should I change my air filter in each mode?
In “Auto” mode, a standard 1-inch filter should be changed every 60-90 days. In “On” mode”, you’re moving three times as much air through the filter, so you should check it and likely replace it every 30 days to prevent restricted airflow, which makes your fan work harder.
Will a smart thermostat automatically manage my fan for me?
Yes, many smart thermostats like the ecobee have advanced algorithms and settings (like the “Circulate” feature mentioned above) that intelligently manage fan runtime. However, even smart devices can run into issues. If you find your Sensi thermostat not working correctly, for example, it may require specific troubleshooting steps. For connectivity-specific issues, our guide on Sensi showing “Connected” but not “Sensi Cloud” addresses the most common remote access and cloud sync problems.
Is a home thermostat the same as a car thermostat?
No, they serve very different purposes. A home thermostat regulates the temperature of the air in your living space. In contrast, a car thermostat, often discussed in terms of a 180 vs. 195 thermostat, regulates the engine’s coolant temperature to ensure it operates efficiently. They are not interchangeable. For more detail on engine thermostat selection and its impact on performance, see our guide on 180 vs. 195 thermostats: engine wear, sludge, and fuel economy.
Can a bad thermostat cause my AC not to cool or heater not to work?
Absolutely. A faulty thermostat is one of the most common — and most overlooked — causes of HVAC performance problems. If your AC is running but not cooling, or your heater is on but producing little heat, the thermostat may be sending incorrect or incomplete signals to your equipment. See our guides on whether a bad thermostat can cause AC not to cool and whether a bad thermostat can cause your heater not to work for specific diagnostic guidance.
How do I know if I need a new thermostat?
Signs that your thermostat needs replacement include: temperature readings that don’t match a calibrated thermometer, HVAC equipment that short-cycles (turns on and off repeatedly in short intervals), fan behavior that’s inconsistent with your settings, or a display that’s unresponsive or shows error codes. Our guide on how to know if you need a new thermostat provides a comprehensive self-assessment checklist.
What thermostat settings should I use when away for an extended period?
For summer absences, set the thermostat to a maximum temperature around 85°F with the fan in “Auto” mode to prevent moisture damage and protect temperature-sensitive items. For winter absences, set a minimum temperature of 55–60°F with the fan in “Auto” mode to prevent pipe freezing. Smart thermostats with geofencing can automate these transitions. See our complete guide on winter vacation thermostat settings for detailed recommendations by climate zone.
Does the thermostat fan setting affect my energy efficiency ratings (SEER/HSPF)?
Indirectly, yes. Your HVAC system’s SEER (Seasonal Energy Efficiency Ratio) and HSPF (Heating Seasonal Performance Factor) ratings are tested under controlled conditions that include specific airflow requirements. Running your fan continuously in “On” mode doesn’t improve your system’s efficiency ratings, but running it in “Auto” mode ensures the system operates closest to its rated conditions. For modern heat pumps, understanding SEER2 and HSPF2 ratings and how they relate to real-world fan and blower operation is important for maximizing your equipment’s efficiency.
Conclusion: The Smart Choice for Your Home
That small fan switch on your thermostat is far more powerful than it appears. The Auto vs. On debate isn’t just about two settings on a dial — it’s a gateway into understanding your entire HVAC system, from the type of blower motor driving your air circulation to the impact of seasonal humidity changes on your family’s comfort. The financial stakes are real: we’ve shown how the wrong fan setting can cost nearly $500 more per year compared to an optimized approach, money that could be redirected toward a smart thermostat upgrade that pays for itself within months.
The verdict for most homeowners is clear: set your fan to “Auto” as your default, and layer in intelligence from there. If you have allergies or temperature stratification problems, configure “Circulate” mode on a smart thermostat to run the fan for 15–20 minutes per hour. This gives you 80% of the air quality and temperature-balancing benefits of “On” mode at roughly 40% of the cost. If you’re still using a manual thermostat, the single most impactful HVAC upgrade you can make — for both comfort and energy savings — is installing a smart thermostat with Circulate mode support.
And remember: fan settings are only one variable in a complex system. Maximizing your home’s HVAC energy efficiency involves proper filter maintenance, regular equipment servicing, thermostat placement, ductwork sealing, and smart scheduling working together. No single change delivers as much improvement as a comprehensive approach — but optimizing your fan setting is the easiest, free first step that delivers immediate results.
Go ahead, walk over to your thermostat right now. That simple assessment of your fan setting is one of the easiest and most effective ways to start saving money today. And if you’re curious about taking the next step, explore our comparison of Nest Auto Schedule vs. ecobee SmartSensors to find the smart thermostat that will manage your fan — and your entire HVAC system — more intelligently than any manual setting ever could.


